With all the major performance upgrades in place, I decided to switch attention to the interior of the car for a while. It actually started off when the car was parked at Shelbyfest in MO in 2018 and someone scratched the cowl on my passenger mirror. That started the search for carbon-fiber covers which led me to TruFiber’s products. Actual carbon-fiber is not cheap, but the results are great so I bought a pair.
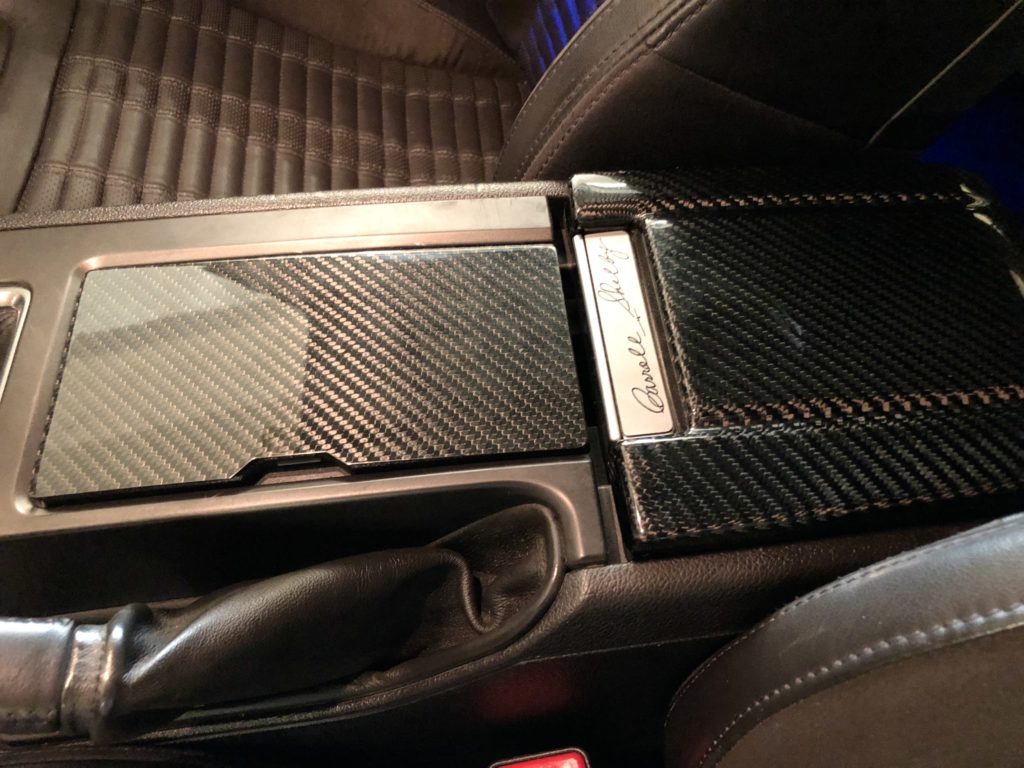
I was so happy with the result that I decided to upgrade the whole interior console too, starting with the cover over the beverage holder and the center console lid. These two were stick on panels of real carbon fiber.
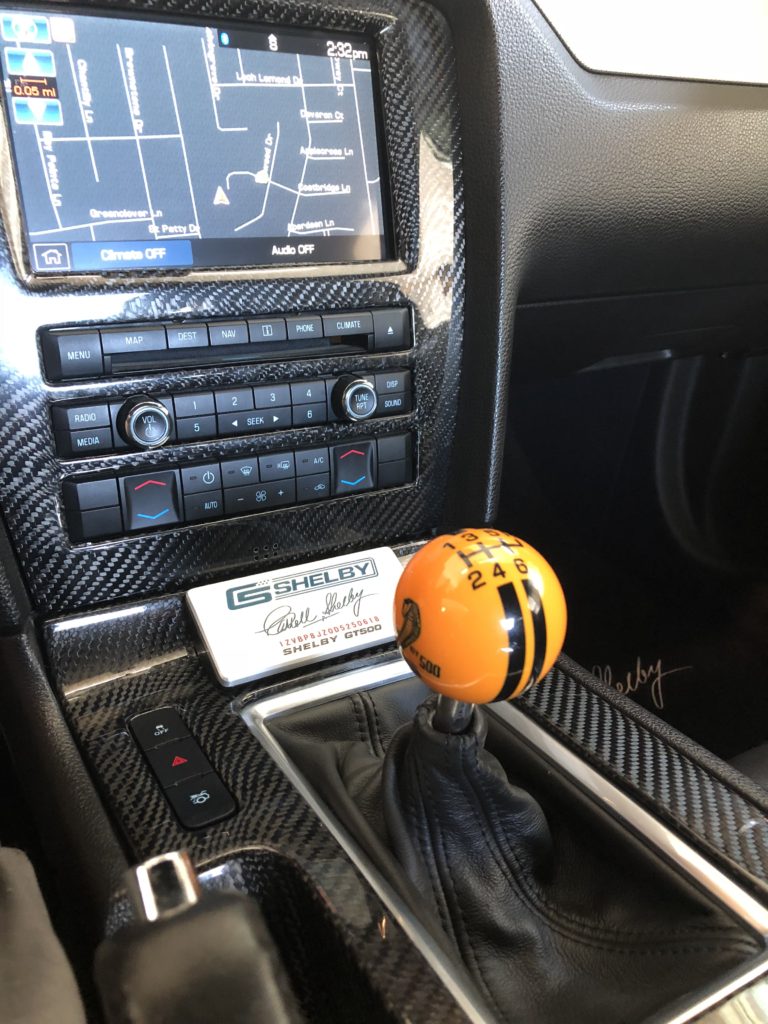
That followed with replacing the gearshift panel and the fascia around the GPS. These were a much bigger deal, however, because the c/f panels actually replace the OEM ones – they are not stick on covers. Ford (in all their wisdom) do not make it easy for you to release the gearshift bezel and boot so it took a number of hours to remove numerous plastic welds and re-attach the new c/f panel using a hot glue gun. The results, however were stunning.
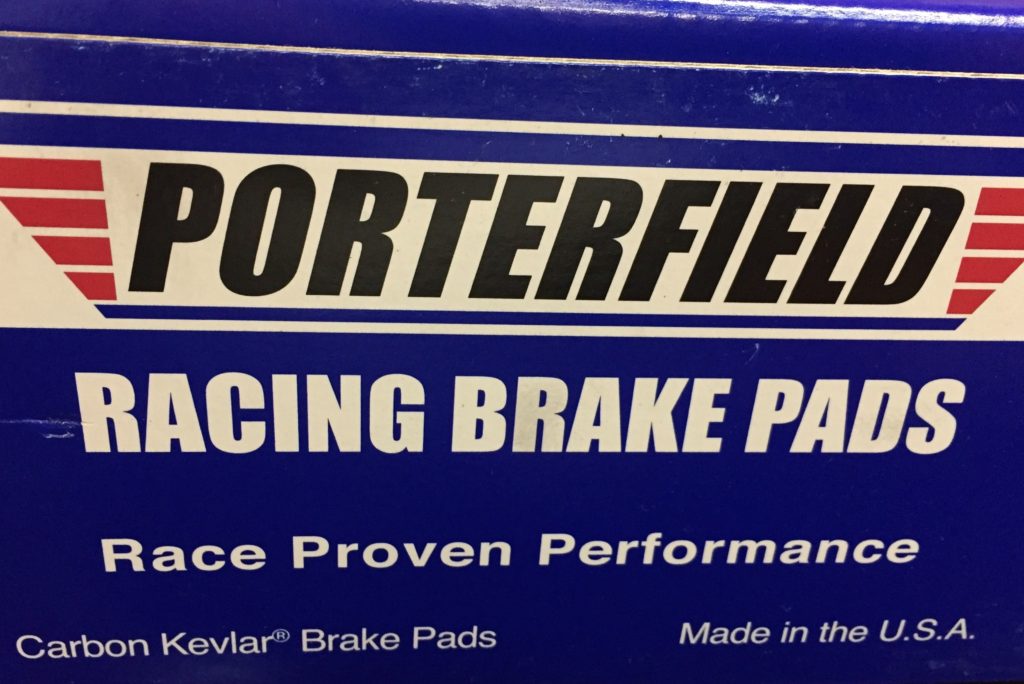
With a lot of performance upgrades done, it was time to pay attention to the brakes. The OEM discs on the 2013/14 Shelbys are huge but the pads can fade under very hard track work and are extremely dusty. The brake dust even under normal driving conditions is really bad – this is bad for a show car as arriving at an event required a lot of wheel cleanup. The dust coats the inside of the wheel well and the side panels of the car, Not good! After some research, the answer was to replace the OEM pads with Porterfield Kevlar-Ceramic pads. Luckily they make ones that are a direct replacement so it’s an easy swap.
Porterfield Carbon Kevlar Brake Pads – 95% less dust!
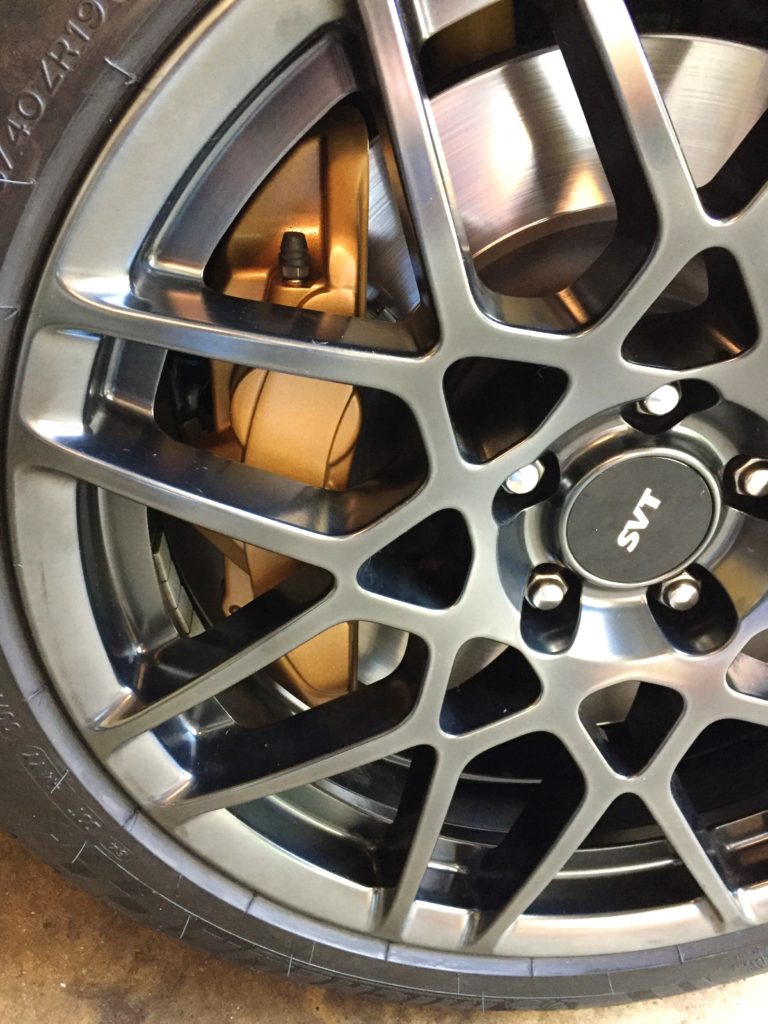
I decided that since I am working on the brakes, it would be a good time to repaint the standard black calipers gold to match the black/gold theme of the car so I did that too.
Photo taken before affixing the Brembo decals
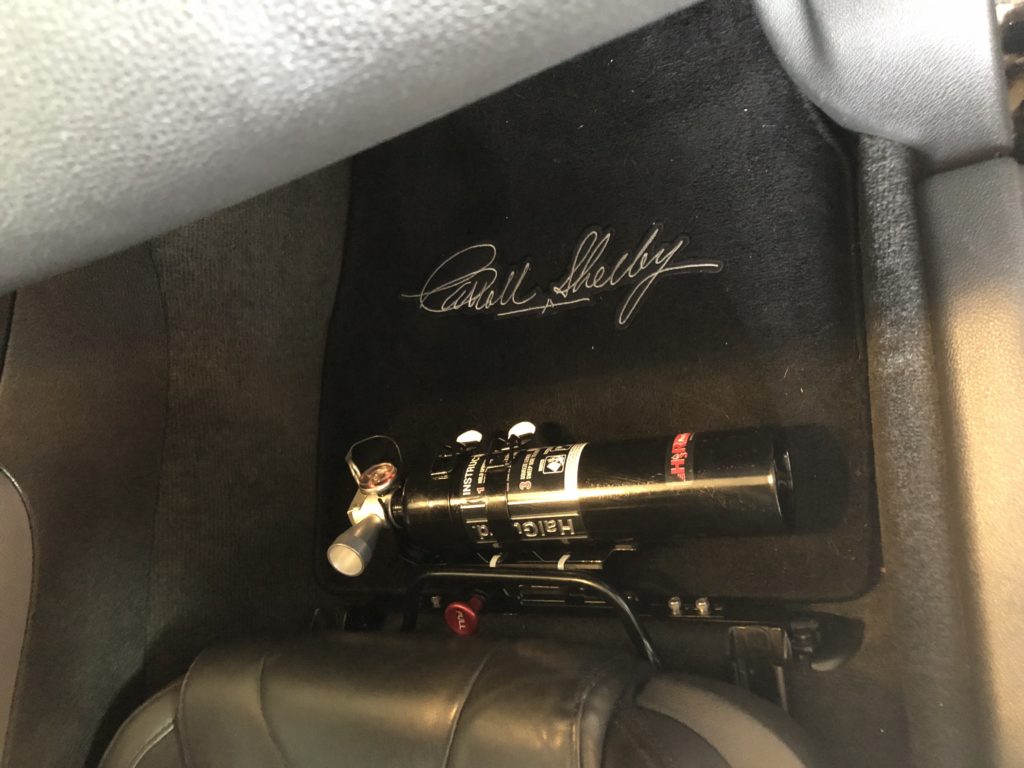
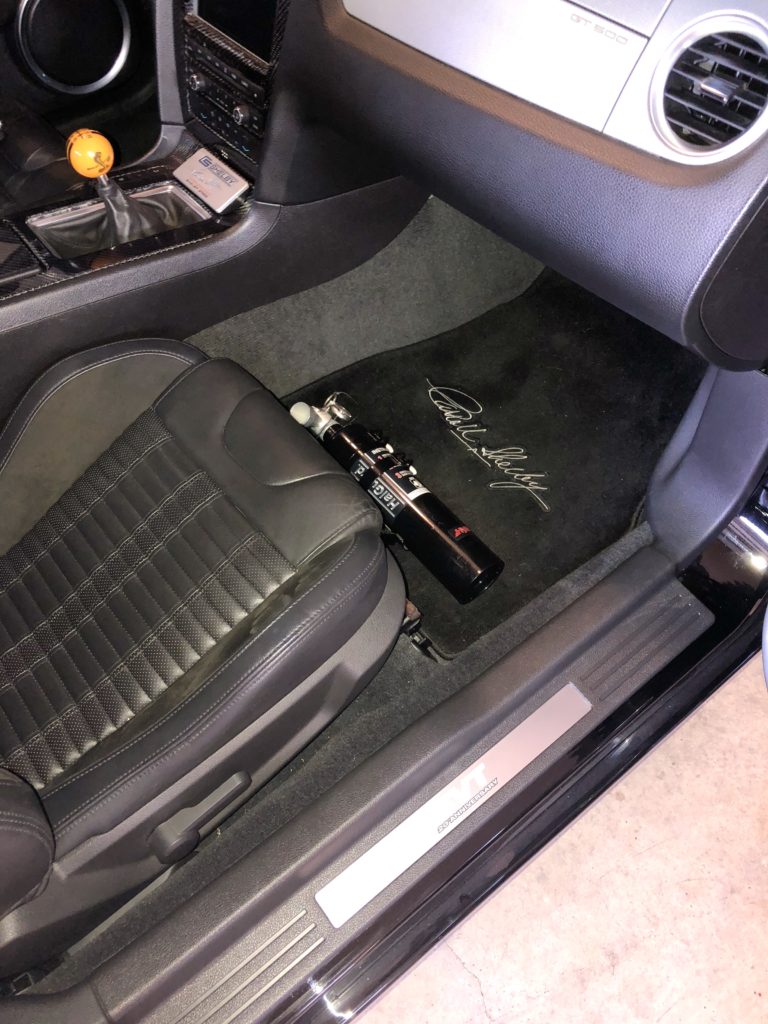
A later safety upgrade was to install a quick-release Fire Extinguisher in the cabin. I have seen high power cars catch fire due to a fuel rail failure or from an accident and it’s a scary sight so this was a must have for me. The choice of extinguisher is important. I chose a 2.5lb H3R Halguard Premium model that one that uses a clean agent – no messy powder or damaging discharge.
Pressing the red button quickly releases the extinguisher
I found a nice bracket assembly from The Bracketeer that bolted on to the passenger seat rail along with a quick-release catch from Drake. It took some minor modification to get it all installed but the result looks great.
It does not interfere with the passenger’s legs or comfort
With the extinguisher in place, the sliding mechanism of the seat cannot be used, which is not a big deal since the only reason to slide it forward would be for leg room for a rear passenger – I may have had a rear passenger once in the entire lifetime I have had the car – but releasing the extinguisher and storing it in the trunk frees up the seat rail – so problem solved!
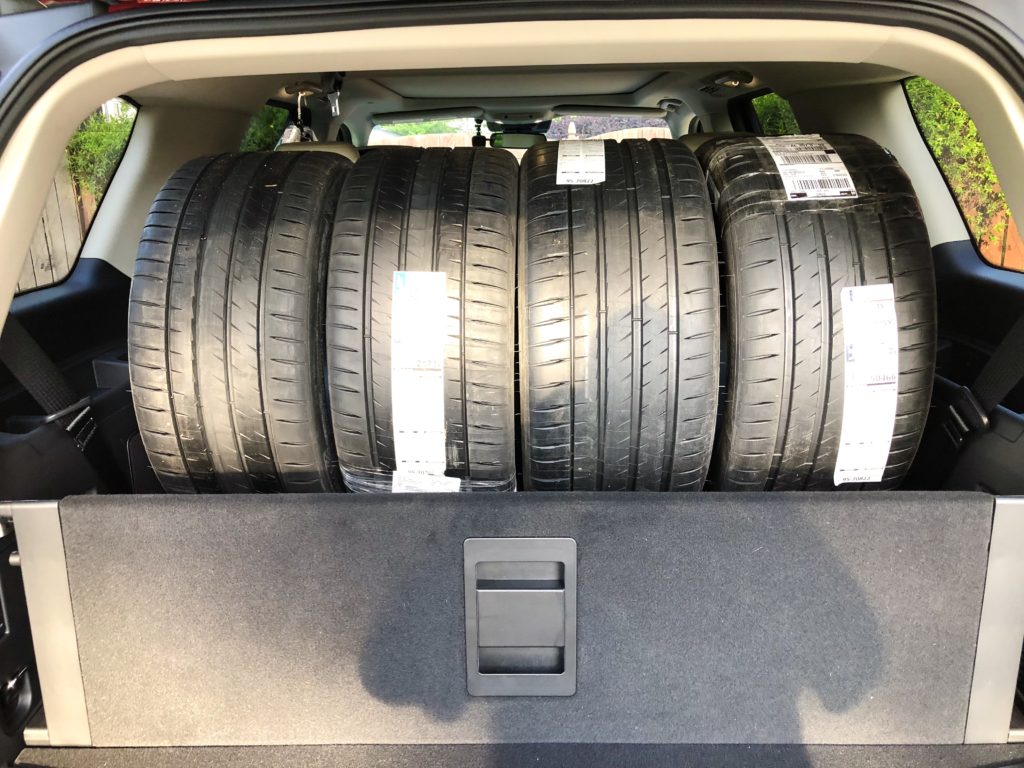
Lastly, my Michelin Pilot Super Sports, which had served me well for the last 20,000 miles needed replacing. I always replace tires from a safety viewpoint, not cost. Michelin now produce the Sport 4S tire which has replaced the original Super Sport – and they are fantastic.
4 linear feet of Michelin Sport Cup 4S tires! – barely fitted inside my truck!
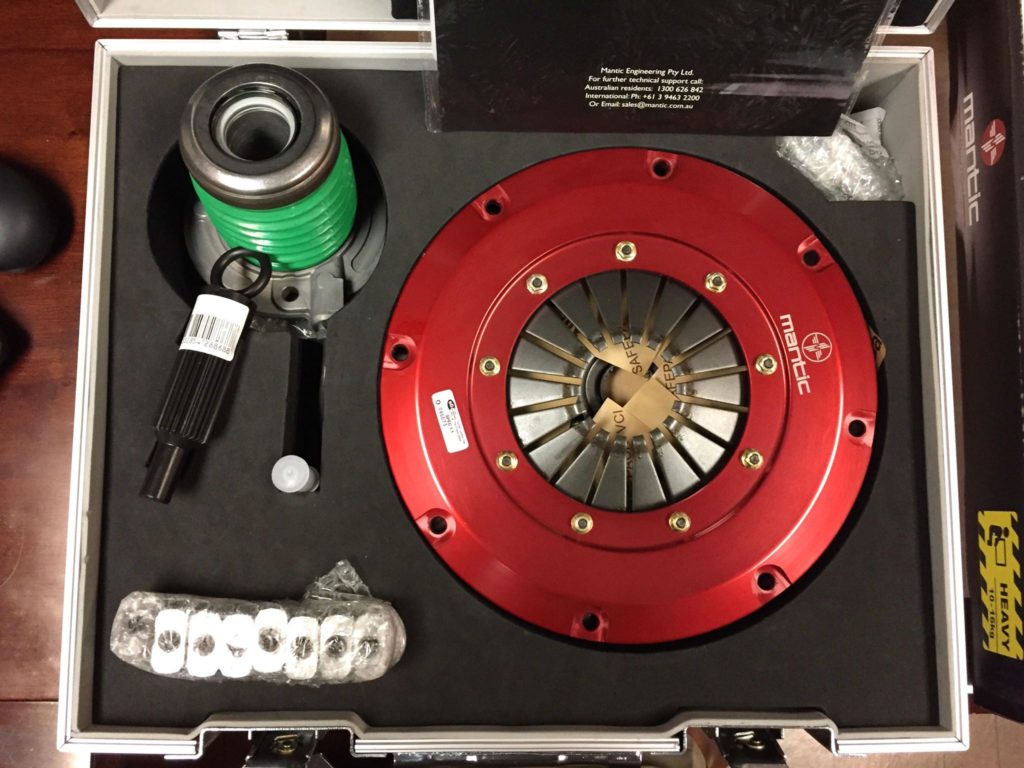
It came as no surprise that upgrading to 800HP would accelerate clutch failure. I was actually quite surprised the OEM one lasted as long as it did. In April, 2017, I entered a freeway and hit the gas in 4th to punch out to the fast lane and I could hear the rpm surge way beyond actual road speed. This was the first clue – and it started doing it every time I applied power, so clearly, the clutch was shouting “help”. The car had 27,500 miles on it.
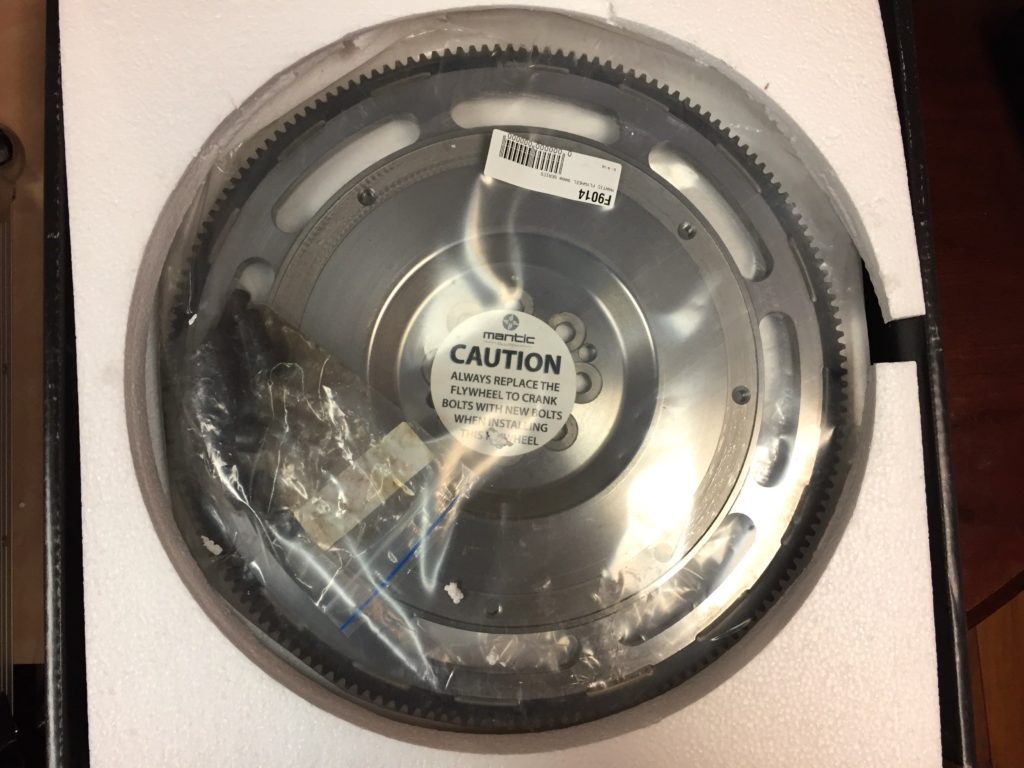
I had already started doing some preemptive research on clutches and there are several popular ones to choose from. What I was wary of was those models that “rattled” in neutral or were clunky in traffic. Out of all the models I considered, I ended up choosing the Mantic 1,000HP Cerametallic Twin Disc Clutch which at close to $2,000, was not the cheapest on the market, but it did come with a new throw out bearing and a lightened steel flywheel. If you are going to replace the throw out bearing, this is definitely the time to do it and the idea of the lightened flywheel appealed to me (more on this later…).
The Mantic 1,000 HP clutch kit comes in this really cool case!
So in May of 2017, the clutch arrived and I booked the car in for the replacement (this sort of job requires a lift for sure!) I used my local Ford Dealer who have certified SVT mechanics. I also got the clutch line replaced with a braided steel line. The car was ready two days later and they warned me that the new clutch was pretty rough as it would need breaking in – that was an understatement! The pedal feel was about the same but it came in a bit higher on the pedal; however it had about two modes – all or nothing. The lightened flywheel meant less inertia so without some rpm; there was a danger of stalling, particularly as the new clutch would bite hard.
Mantic’s lightened steel flywheel
The break in period was about 600-800 miles so I daily drove the car for weeks to give it lots of shifts and avoided any hard acceleration or clutch dumps. It was pretty brutal the first couple of weeks but gradually it got better but in neutral with the pedal off the clutch there was still quite a pronounced rattle – which was just what I was trying to avoid. After every 1,000 miles, however, the clutch became smoother and smoother and the rattle all but disappeared. At the time of writing this (Dec 2018 at 43,500 miles), its turned out to be a great clutch. It’s smooth as butter and instills a lot of confidence. It still bites harder than an OEM one and I still need to take off with more throttle, but it’s nothing like the all or nothing one it was like when new. For sure, a lightened flywheel revs more quickly! A couple of Shelby friends of mine have since driven the car and both got used to it very quickly.
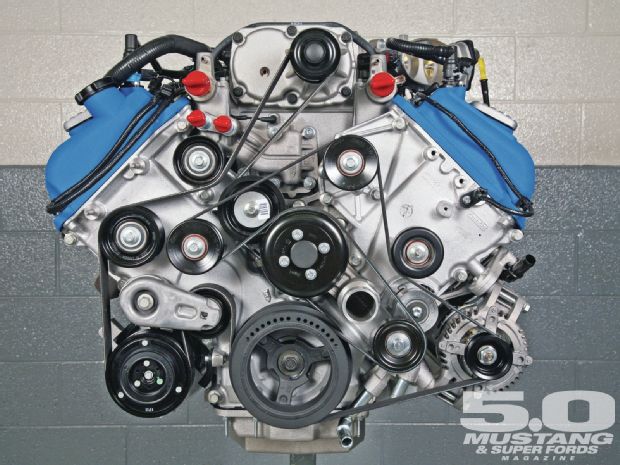
The “Trinity” engine in the 2013/2014 Shelby is an awesome motor. Each engine is hand built by two highly experienced SVT (Special Vehicle Team) specialists whose signatures are on a plate that is attached to the engine. For those of you who want to read a great article on this motor look no further than this article on Mustang360 magazine:
2013 Ford Shelby GT500 Trinity 5.8L V8 – Power Of Three
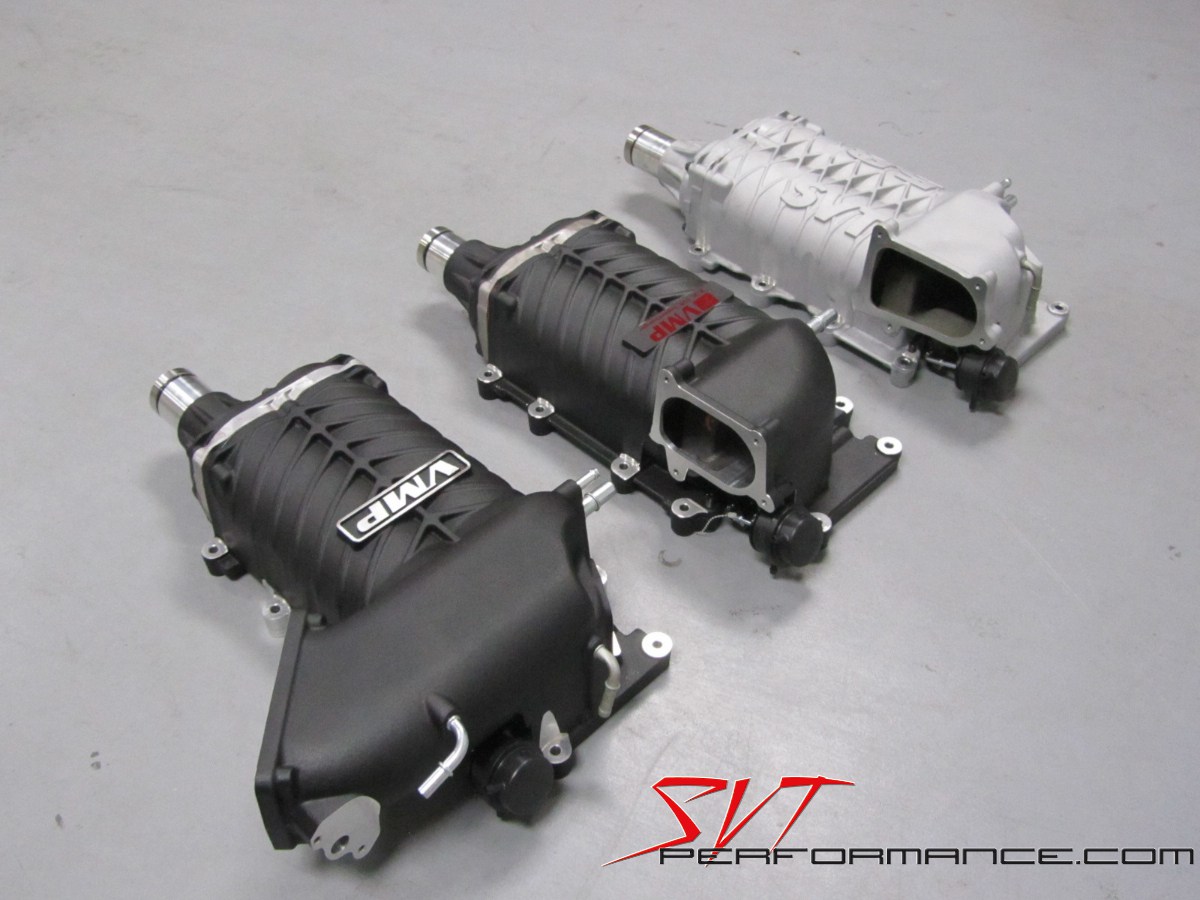
To give you an idea of the comparison differences between the stock TVS supercharger (above) and the VMP Gen II supercharger I replaced it with, here is a photo. The VMP Gen I blower is also shown. The big difference is in the porting. The VMP Gen II can suck in a lot more air as it is much less restrictive.
VMP Gen II, VMP Gen I and the stock TVS superchargers compared (photo courtesy of SVTPerformance.com)
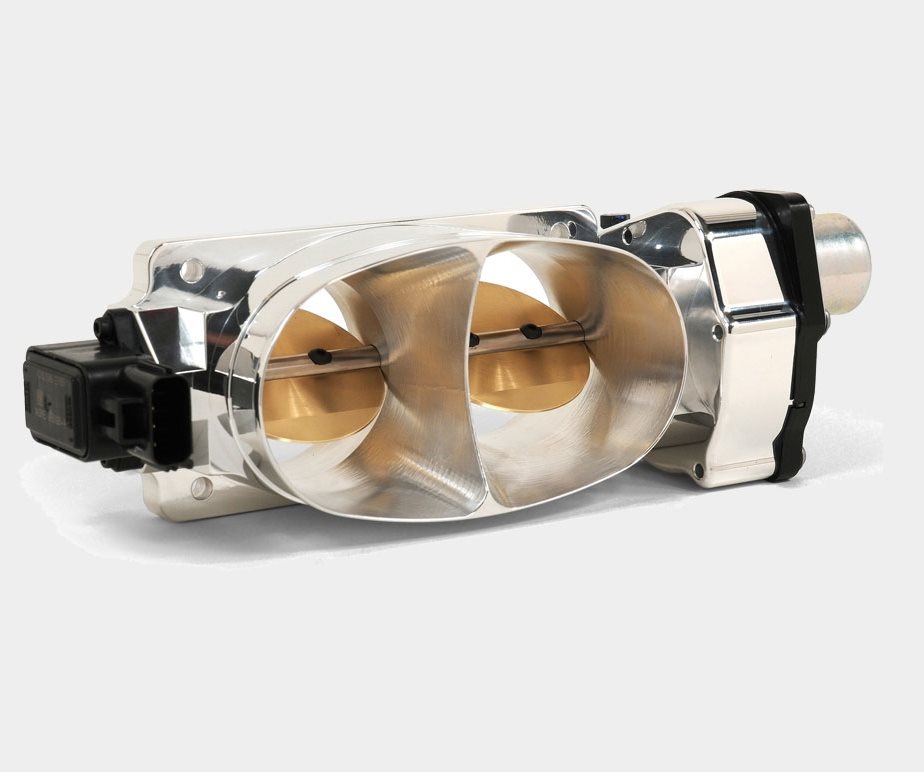
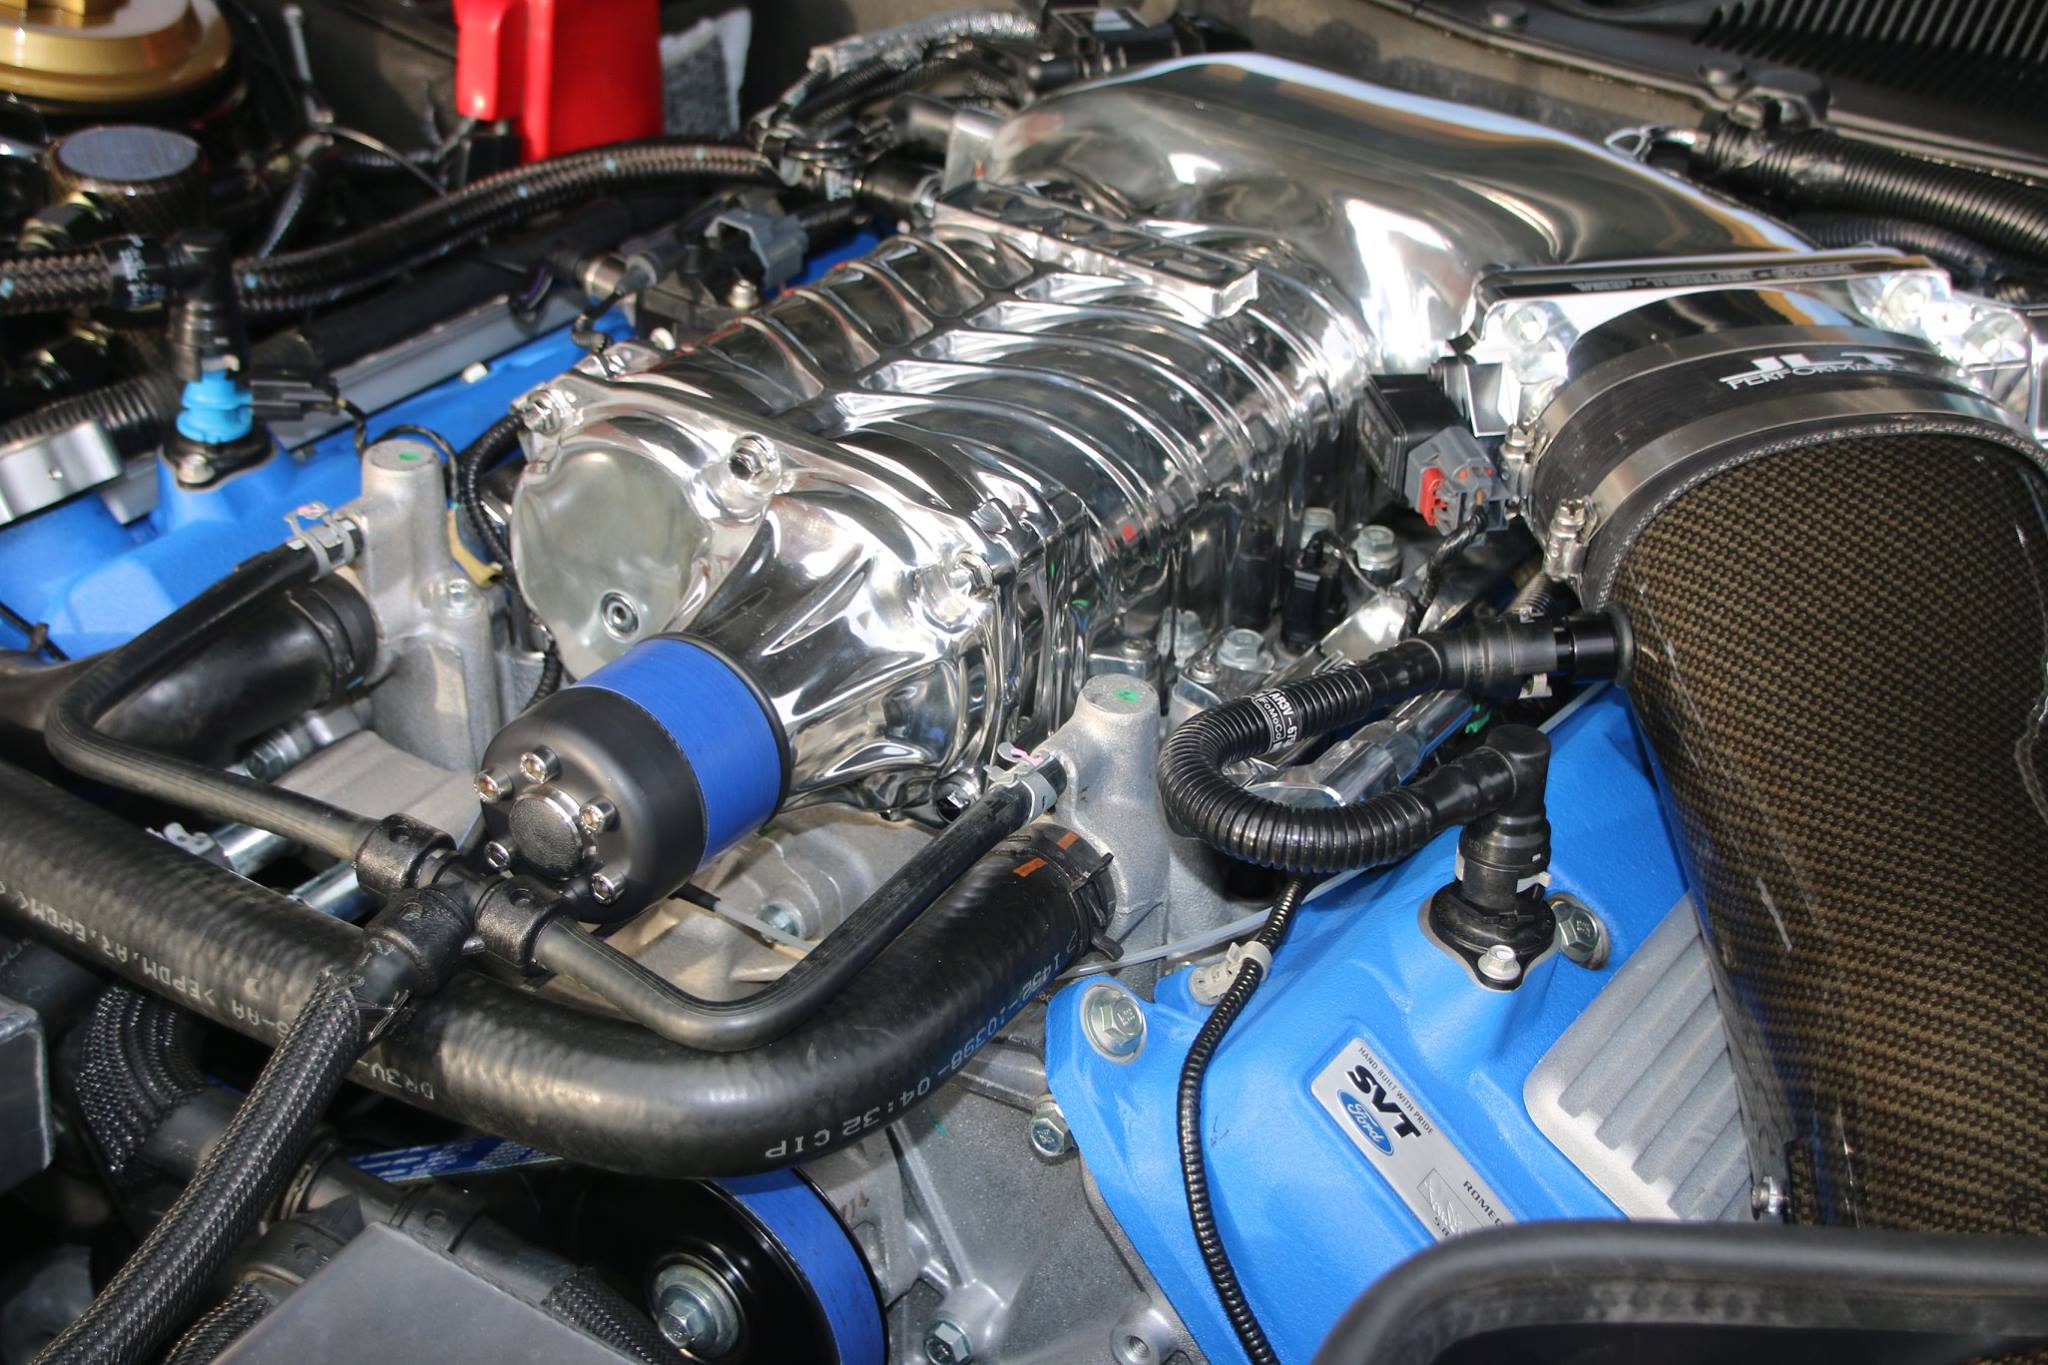
To take advantage of the bigger porting on the VMP Gen II supercharger, requires a bigger throttle body. The stock throttle body is a 54mm one – this was upgraded to VMP’s enormous 67mm twin throttle body.
VMP 67mm Throttle Body
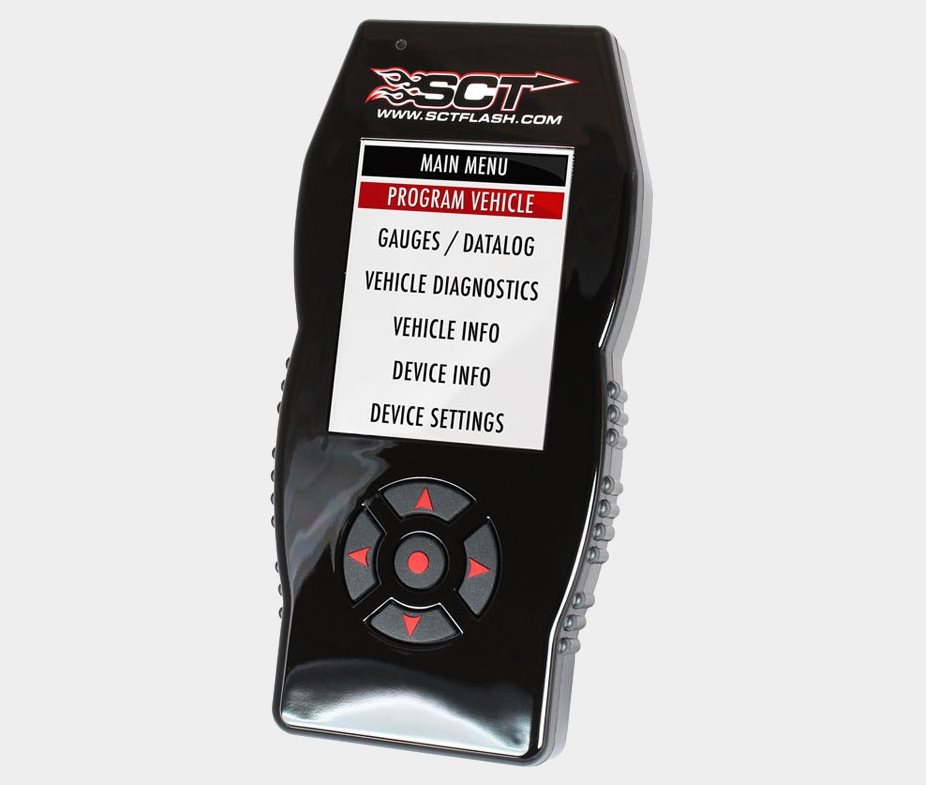
All upgrades require a new tune to be uploaded. VMP provided me with a complete custom Stage 4 tune and I uploaded it using my SCT4 Tuner
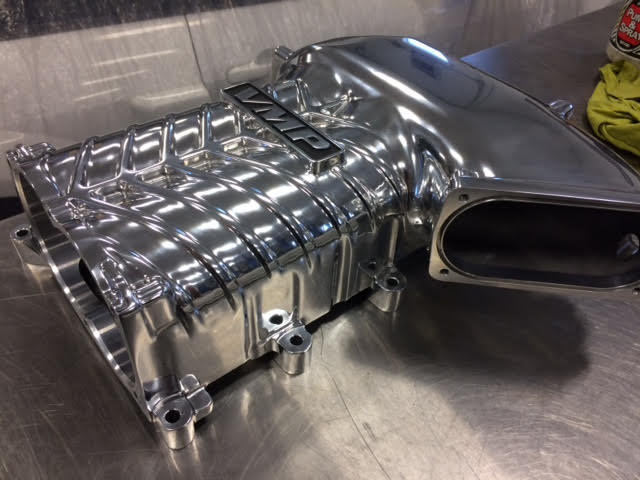
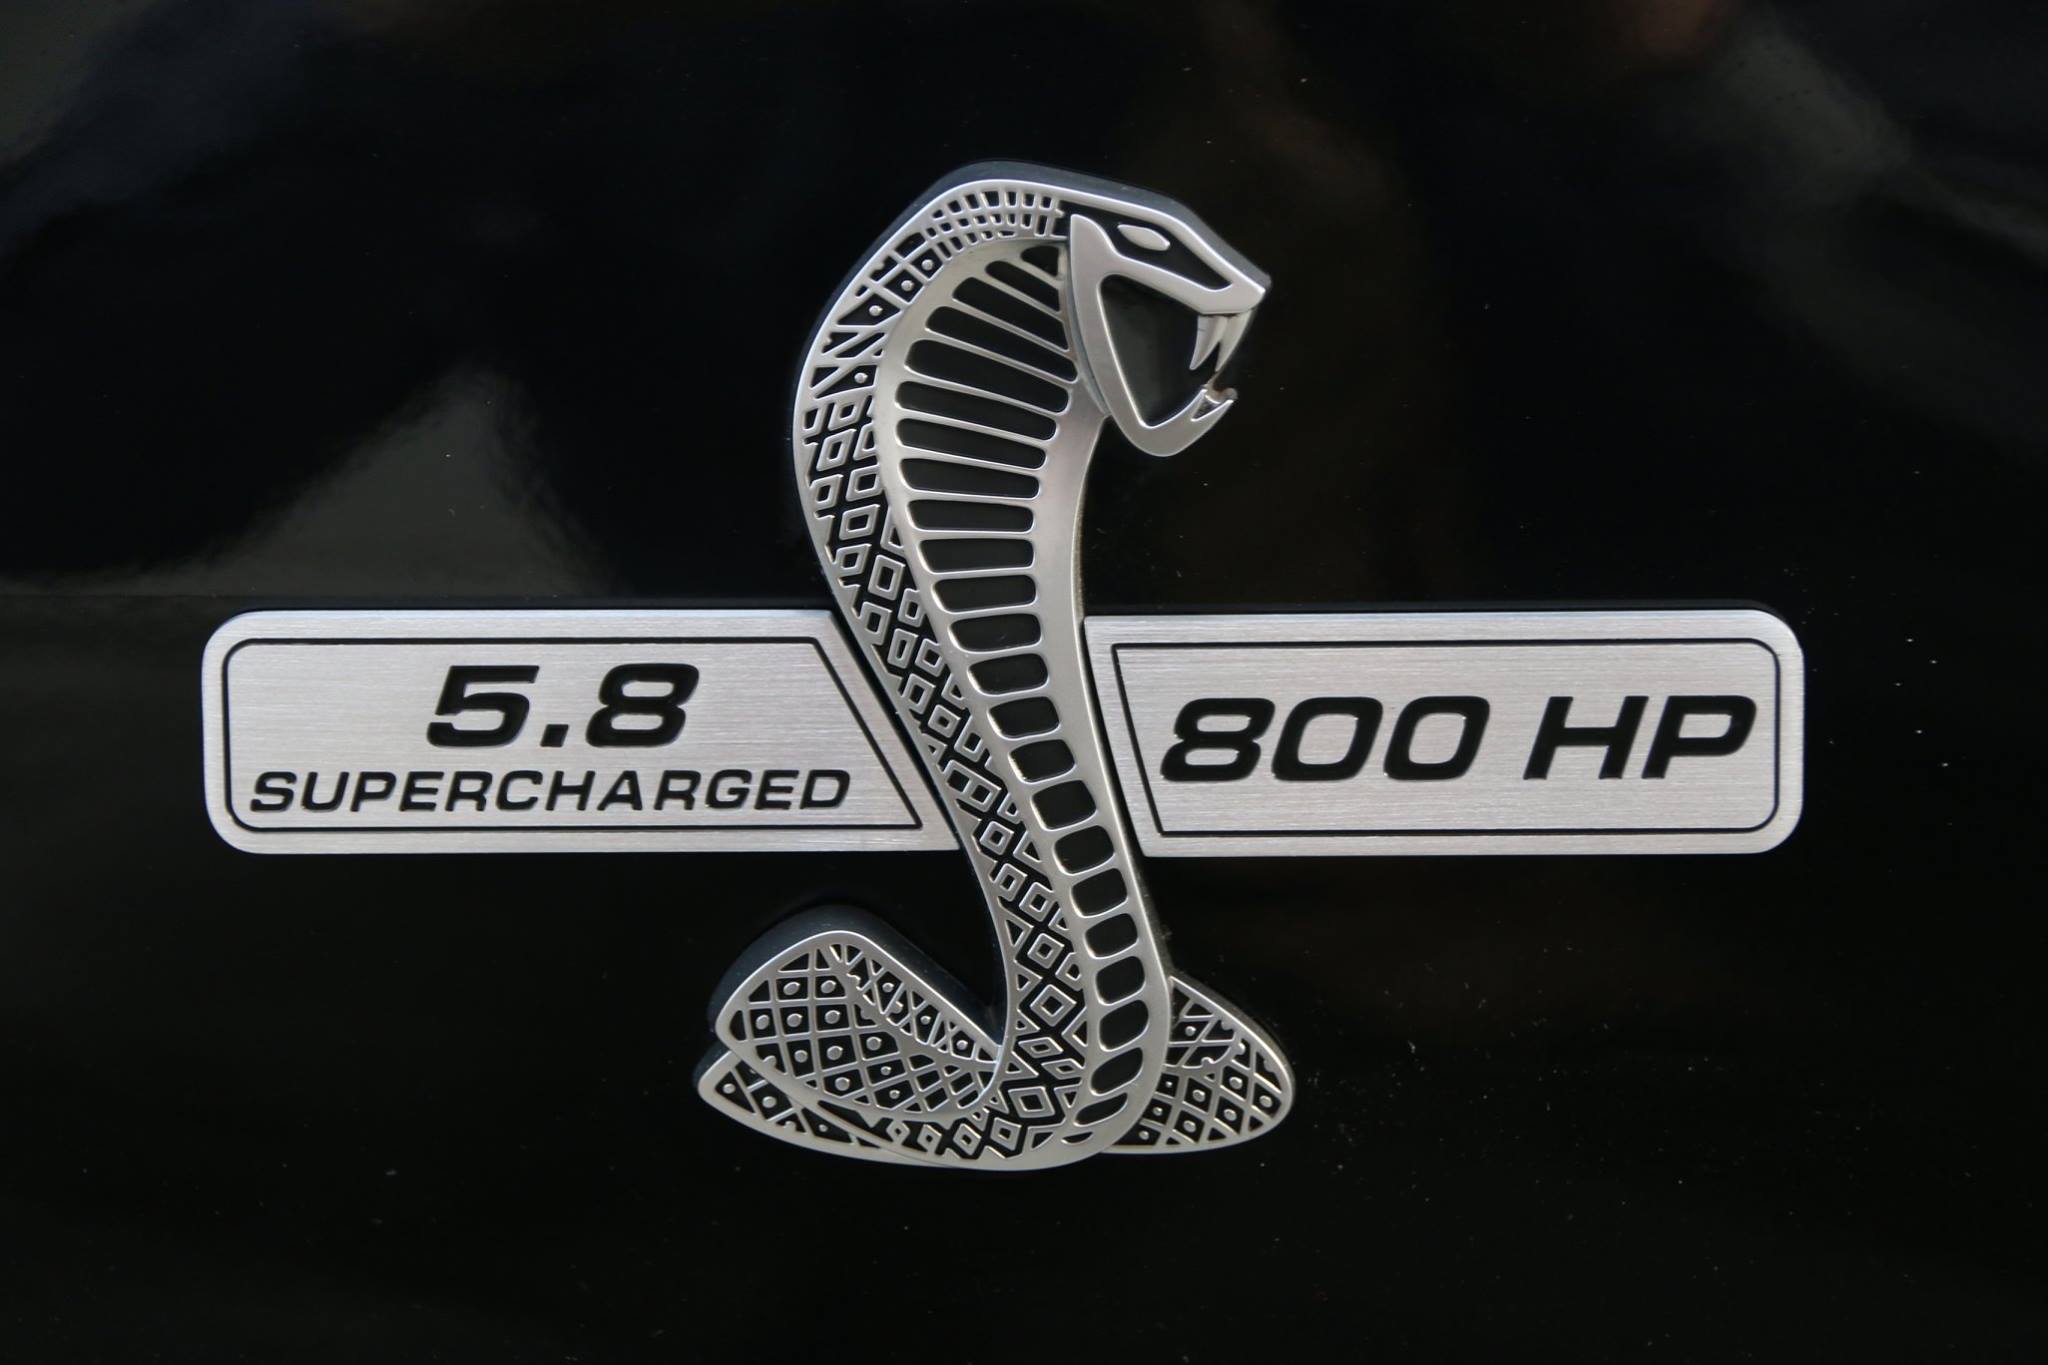
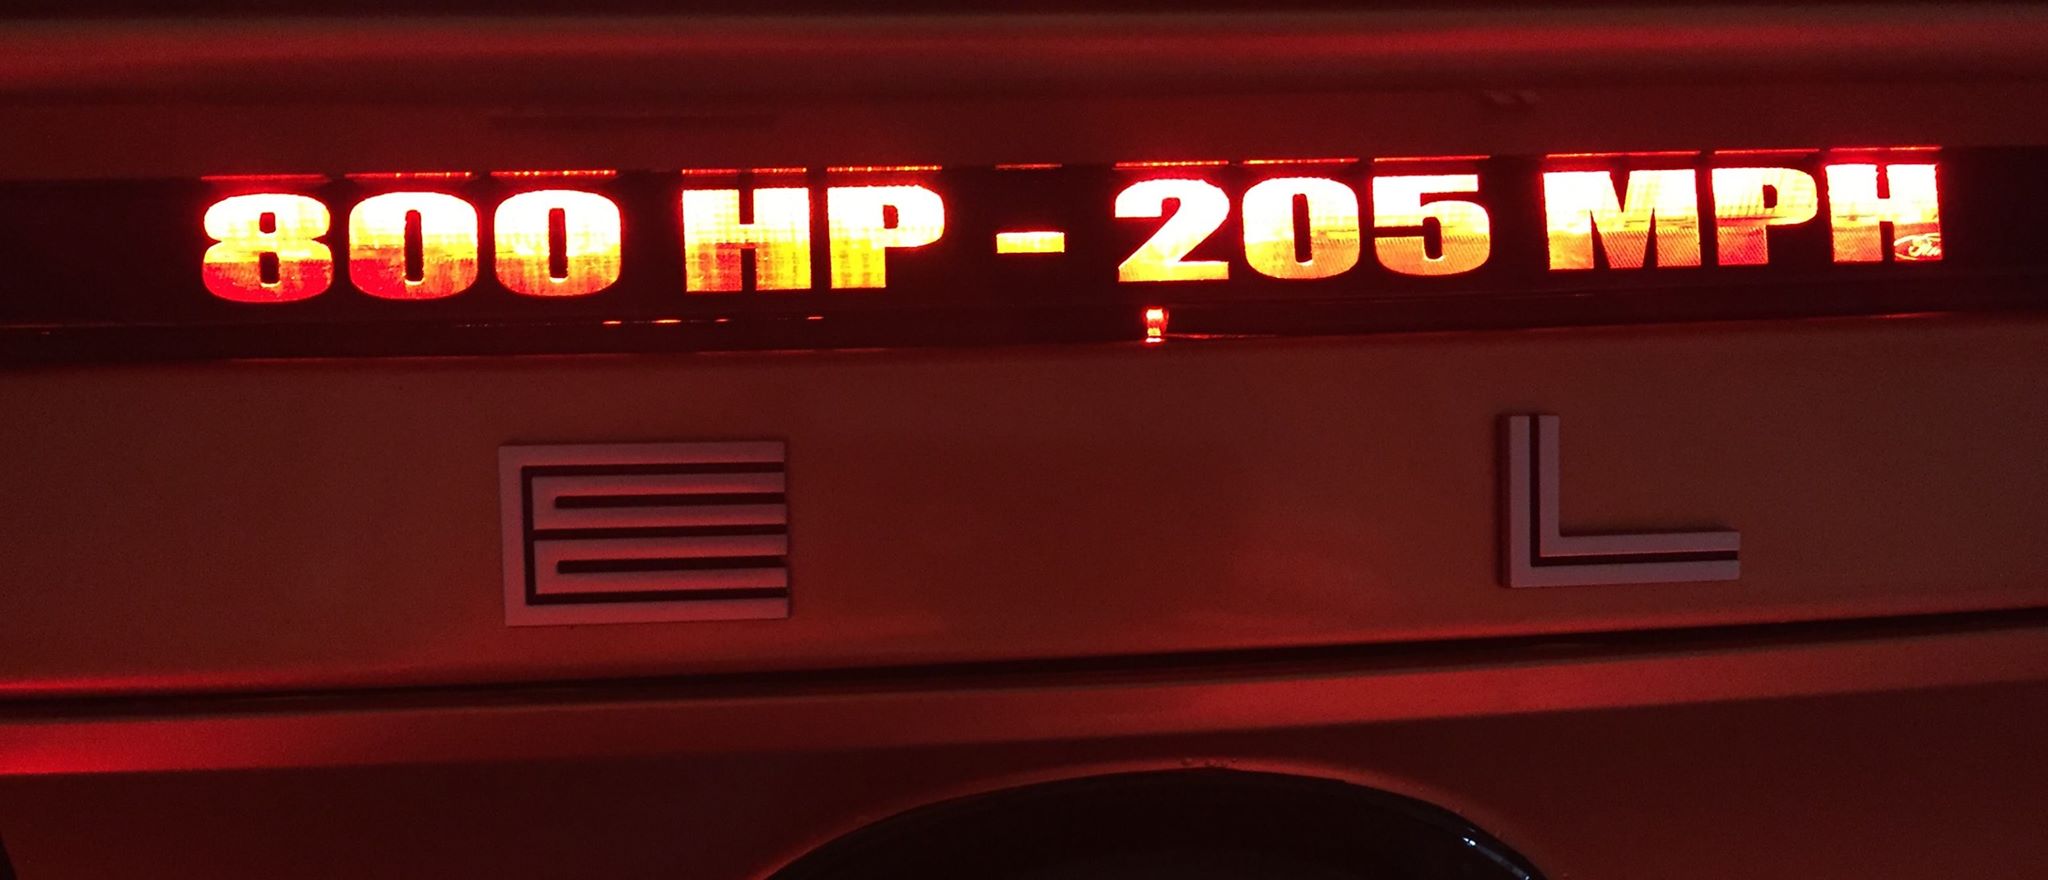
As if 662 HP wasn’t enough, SoScary was upgraded to 800 HP in March of 2016. I met Sylvain from Billet Pro Shop in Ontario, Canada at a National Mustang Racing Association event in Bowling Green, Kentucky in the fall of 2015, and loved the detailed polishing work he has done on a friend’s stock TVS supercharger. The catch was that the work took around 3 months to do and the supercharger was off the car for that time so it couldn’t be driven. My solution to all this was to simultaneously upgrade it with VMP’s new Gen II supercharger that had a much better porting and since BPS is a VMP dealer – they could take one off the shelf and polish it up while I still had my stock TVS on the car. The results, as you can see, are amazing!
VMP custom polished this new Gen II supercharger for me
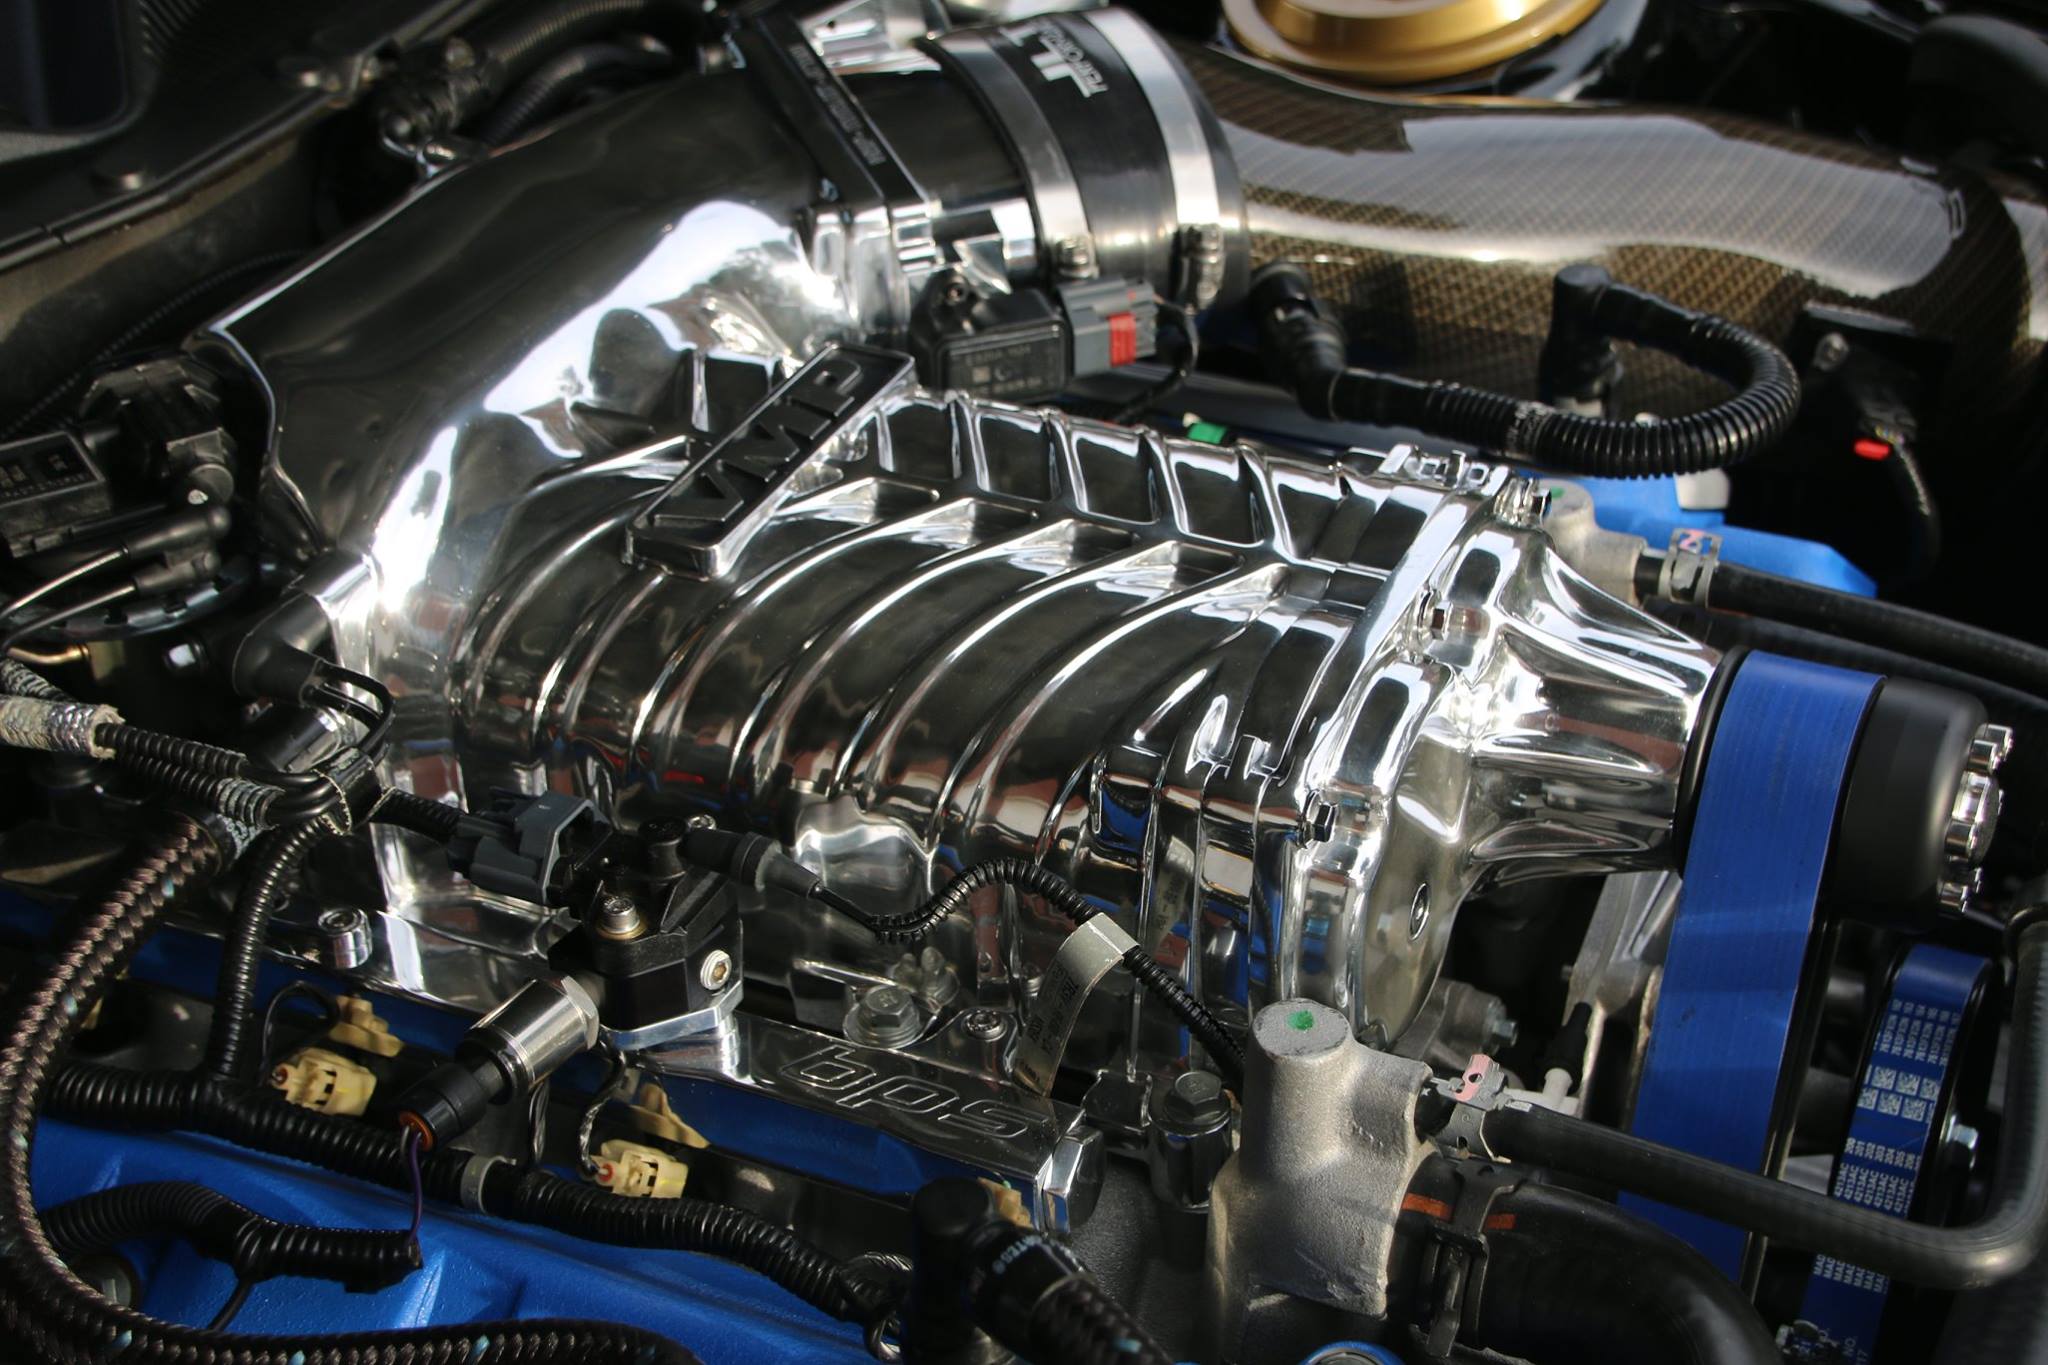
The big mod day came on March 6th, 2016 when we replaced the stock supercharger with the new one complete with a new smaller 2.4″ pulley; fitted a VMP 67mm Throttle Body; new bigger JLT Cold Air Intake; BPS polished fuel rails; Gates Racing Blue Belts with new idlers; Brisk Racing spark plugs; and uploaded VMP’s Stage 4 tune.
Passenger-side view showing the new BPS polished fuel rails
While the supercharger was up in Canada getting polished, I got the radiator cover, oil catch can and the new JLT intake tube all carbon-fiber dipped!
Driver-side view showing the new VMP 67mm throttle body
Gates Racing Blue Belts added a nice enhancement to the engine bay
Gates Racing Blue Belts
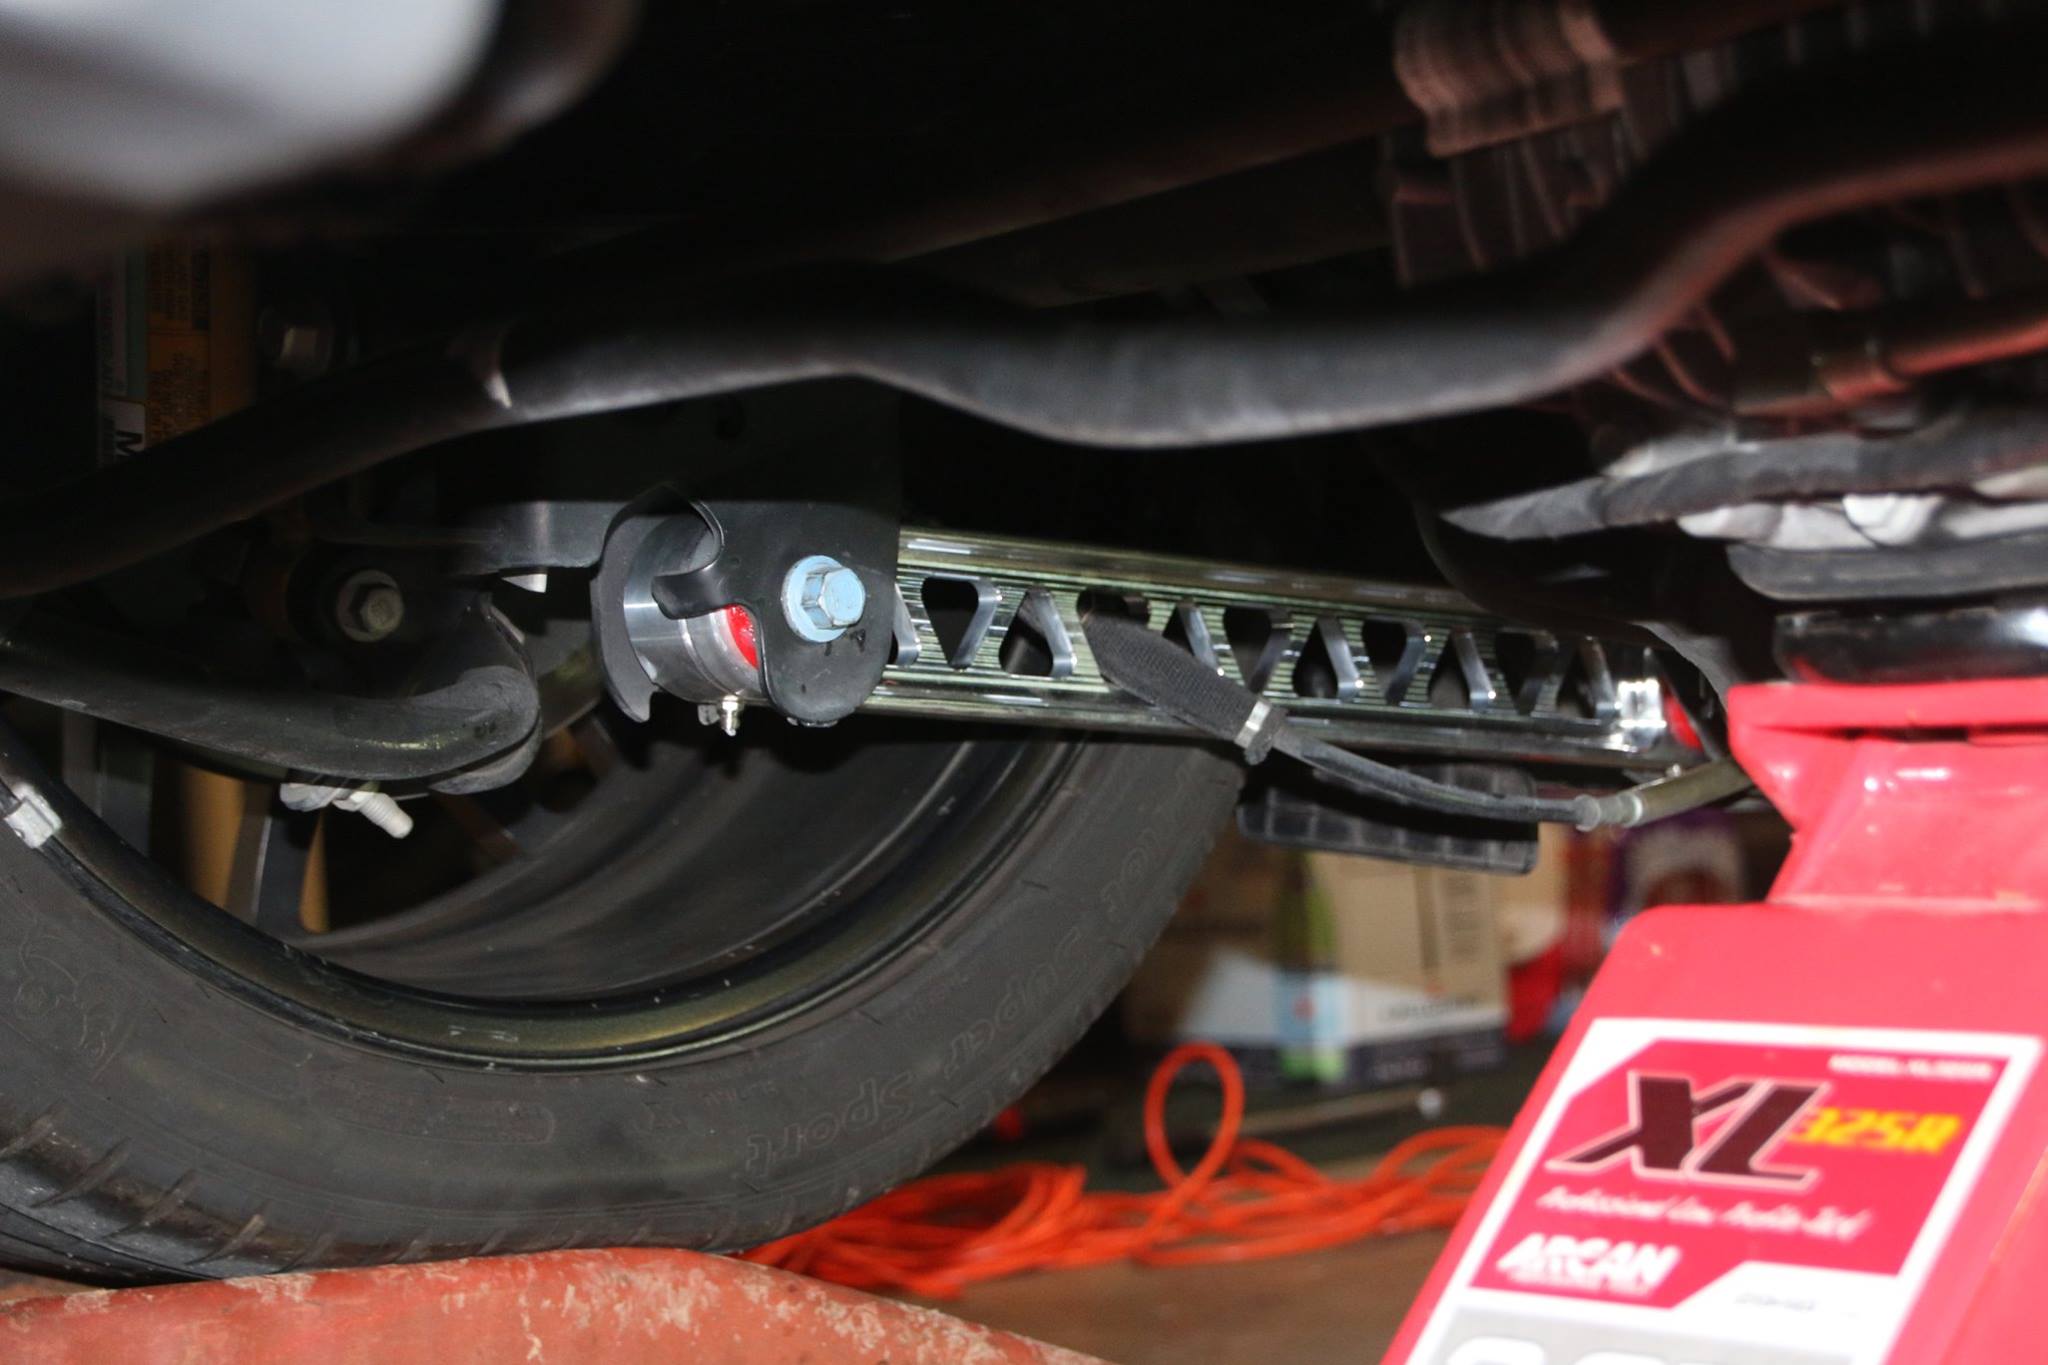
The suspension got some attention too – you can’t upgrade to 800 HP without considering the implications for handling all that extra power. The OEM Lower Control Arms have rubber bushings which flex under heavy power and that cam allow the rear axle to step out of line and causes wheel hop. I replaced these with Polished Billet LCA’s with polyurethane spherical bushings. This tightened up the back end considerably but at the expense of some ride comfort.
Billet Aluminum Lower Control Arms
Some of the smaller touches added included updating the wings, the center-brake light mask and adding the Shelby logo to the lower Heat Exchanger.
New wing with 800 HP!
Shelby logo added to the lower Heat Exchanger
Center brake light overlay
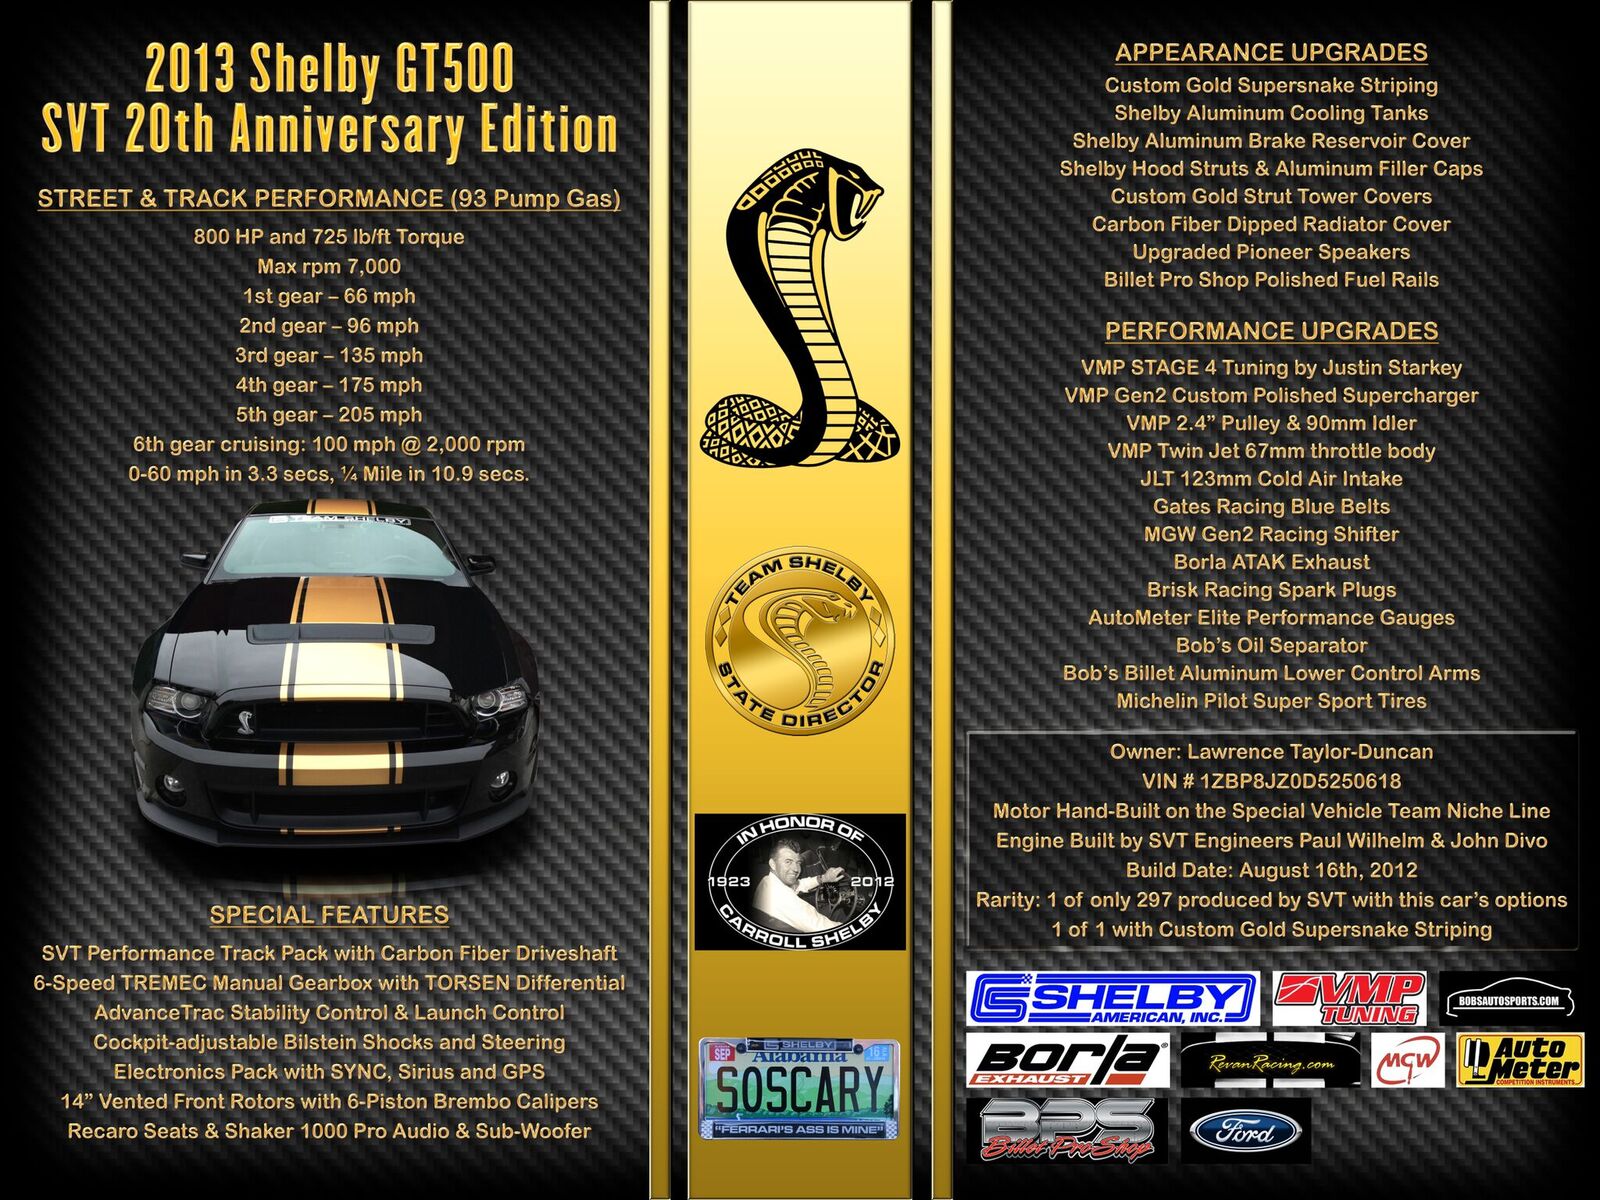
And here is my new Poster Board designed by Peter Nikolaou…
Welcome to my blog – its all about my 2013 Shelby GT500 – also known to my Mustang friends as “SoScary” – its tag. On Feb 1, 2015 I published the first 5 posts and just added a 6th post on March 12th, 2016 that details my upgrade to an 800 HP monster. I just added three more posts in Dec 2018 so I have been catching up! I hope you find my story and photos interesting. I started the blog for fun as I have some friends and family who are not on Facebook and so they miss out on all of the developments as I customize and mod my car to make it very unique and my own. Blogs are always work in progress so come back and visit from time to time or subscribe for updates!
If you are reading this and are not big into cars, let me preface this by stating that unmodified Mustangs are quite a rare breed. Sure there are soccer moms who are not into the Mustang scene and use them just for driving to work, the grocery store and schools, but then there is the rest of us – thousands of Mustang owners who live and breath the breed every day! Making your Mustang your own is the name of the game. Some go strictly for performance mods, some focus more on looks, there are many that mod their engines, suspension and tires just for the track or drag strip but for most of us it’s a bit of all of that – usually tempered by budgets or time constraints– or to avoid voiding the warranty!
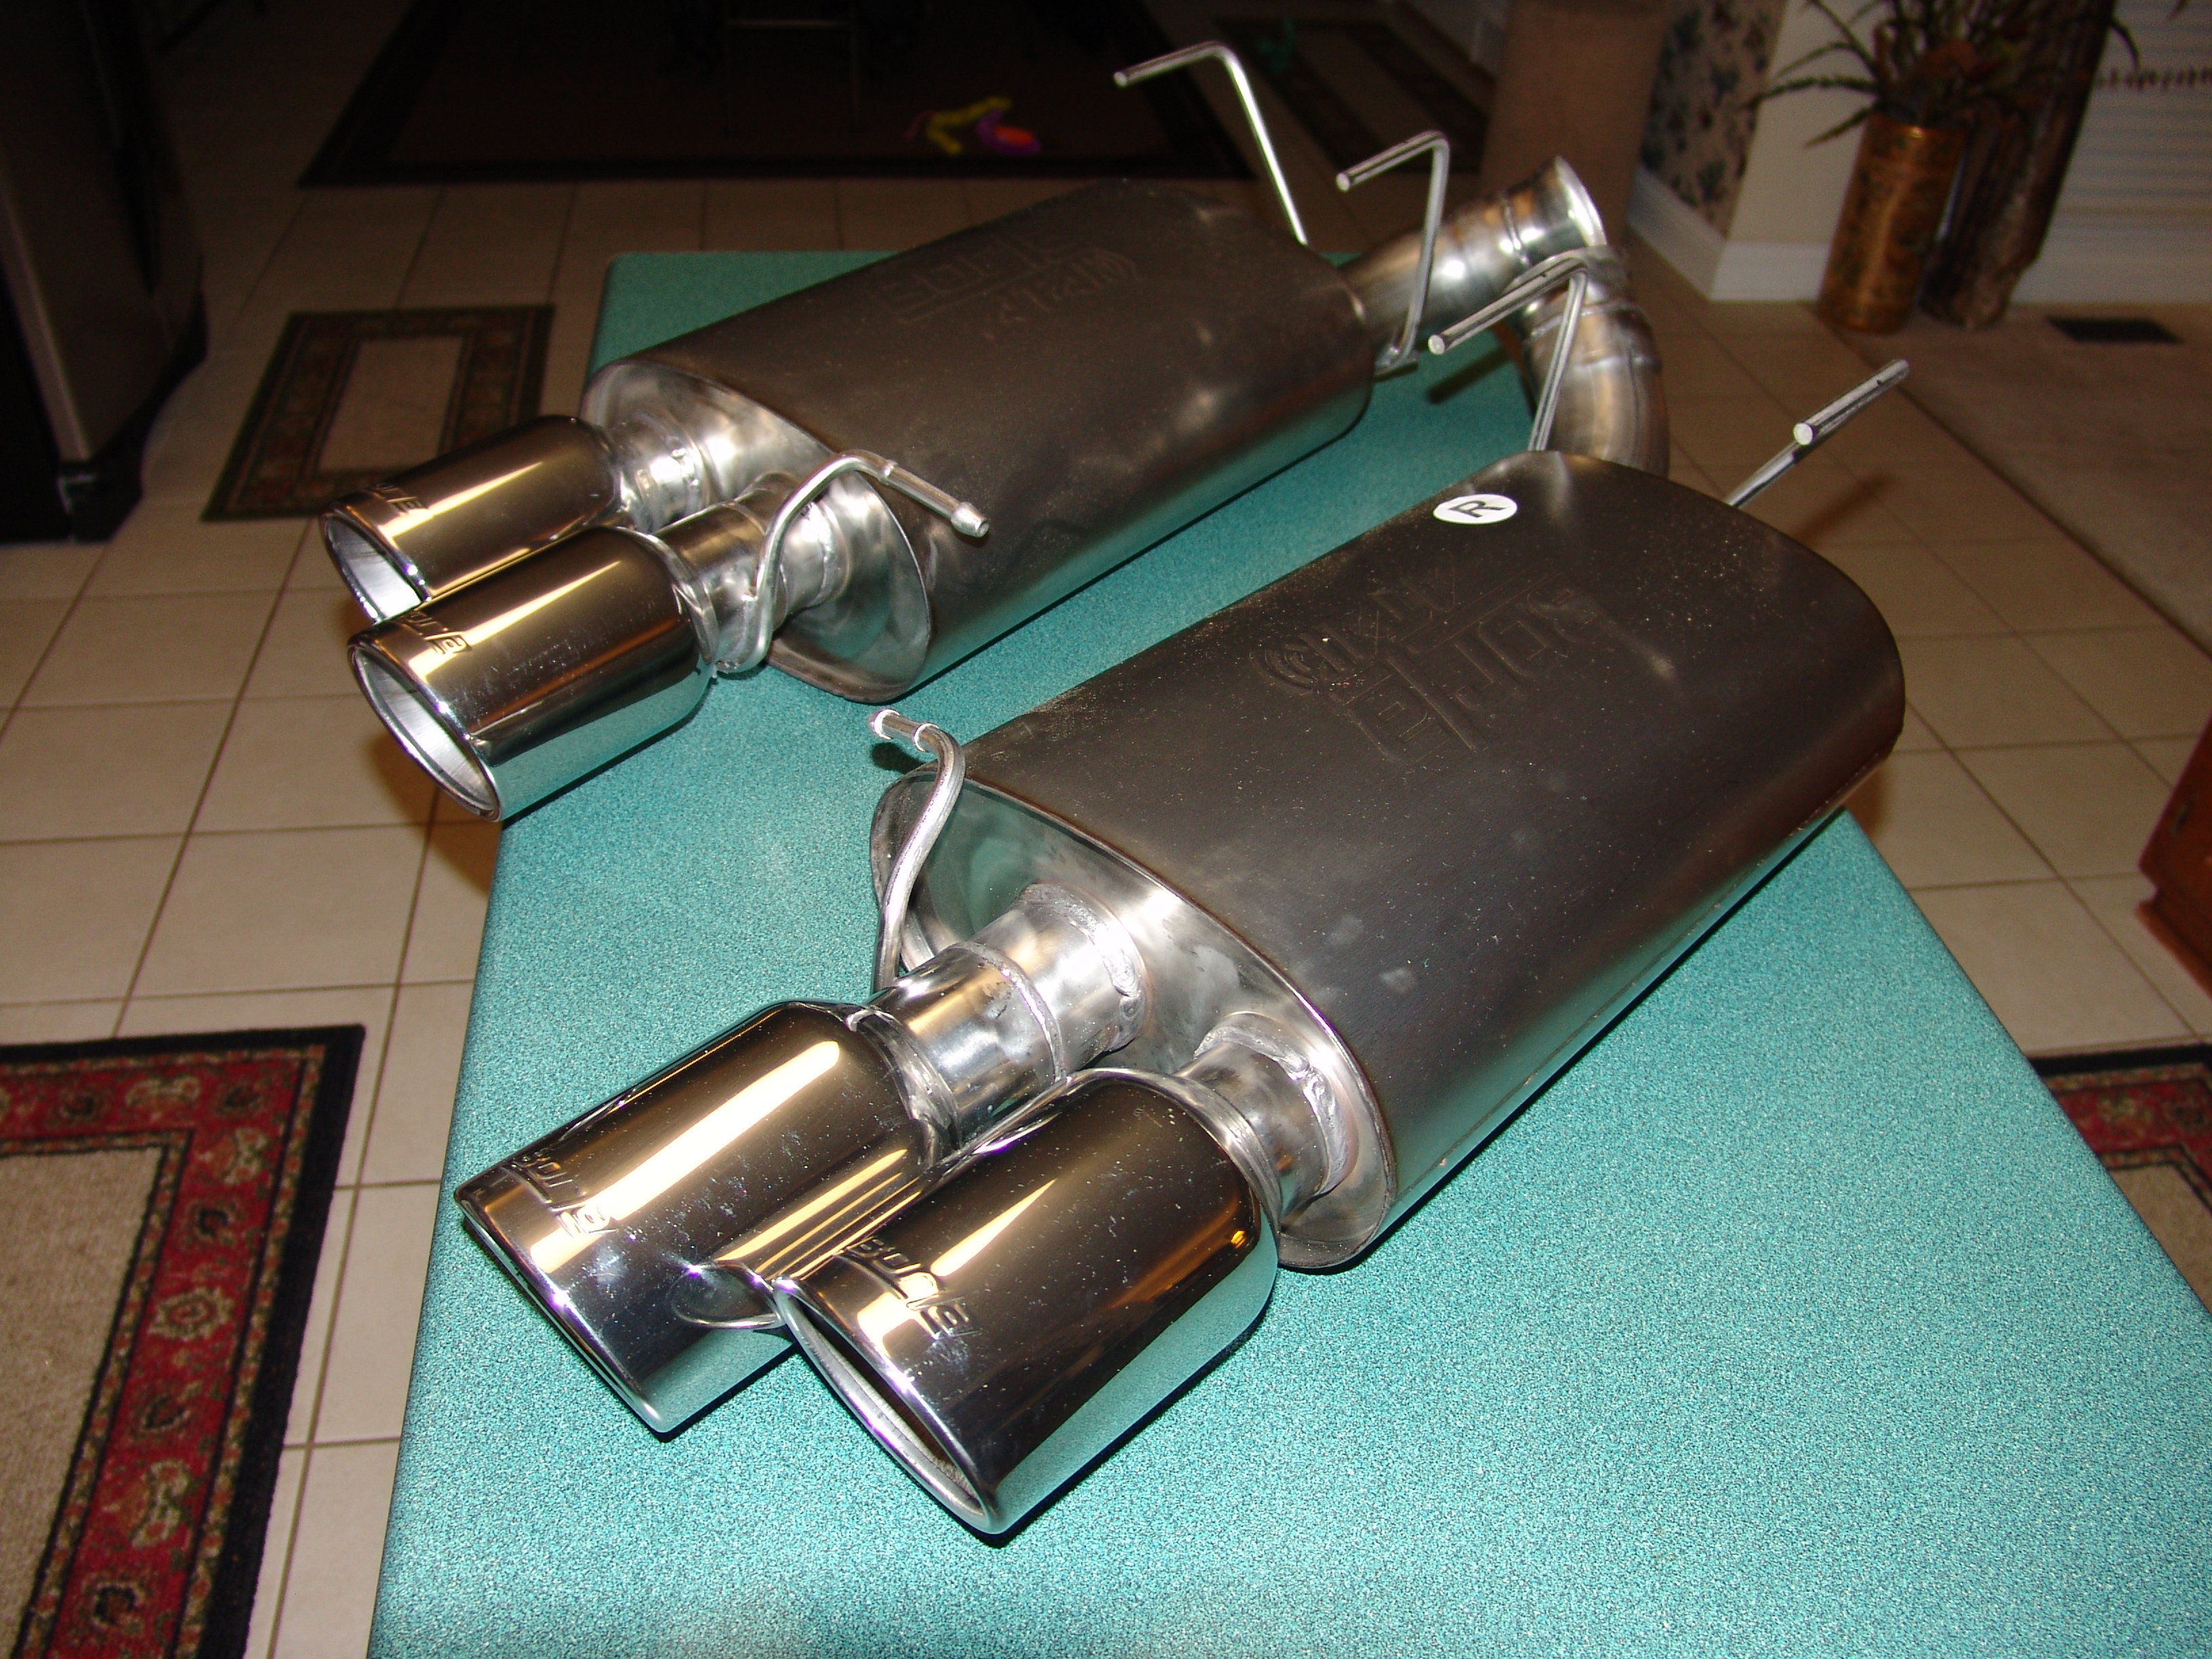
The first big mod I did in early 2013 was to replace the rear exhaust mufflers (called axle-backs) with sportier ones that sounded more like a muscle-car should. To be sure, the stock OEM ones sounded good, but that was Ford’s sound bite for the general public. I wanted something much racier – and worthy of the Supercharged 662HP monster up front. Choosing which ones to go with is a very personal taste and I read a lot, listened a lot and eventually decided on Borla ATAKs. These are their most “aggressive” model and boy do they sound good! It was important to me that they did not sound obnoxious and did not “drone” in the cabin – which they don’t.
My new Borla ATAK axle-backs – before they went on the car
The Borlas let me sneak reasonably quietly out of your neighborhood in the early hours of the morning, but the minute I hit the gas, they get really aggressive and heads do turn! They are made 100% from stainless steel with rolled chrome tips and have a lifetime warranty.
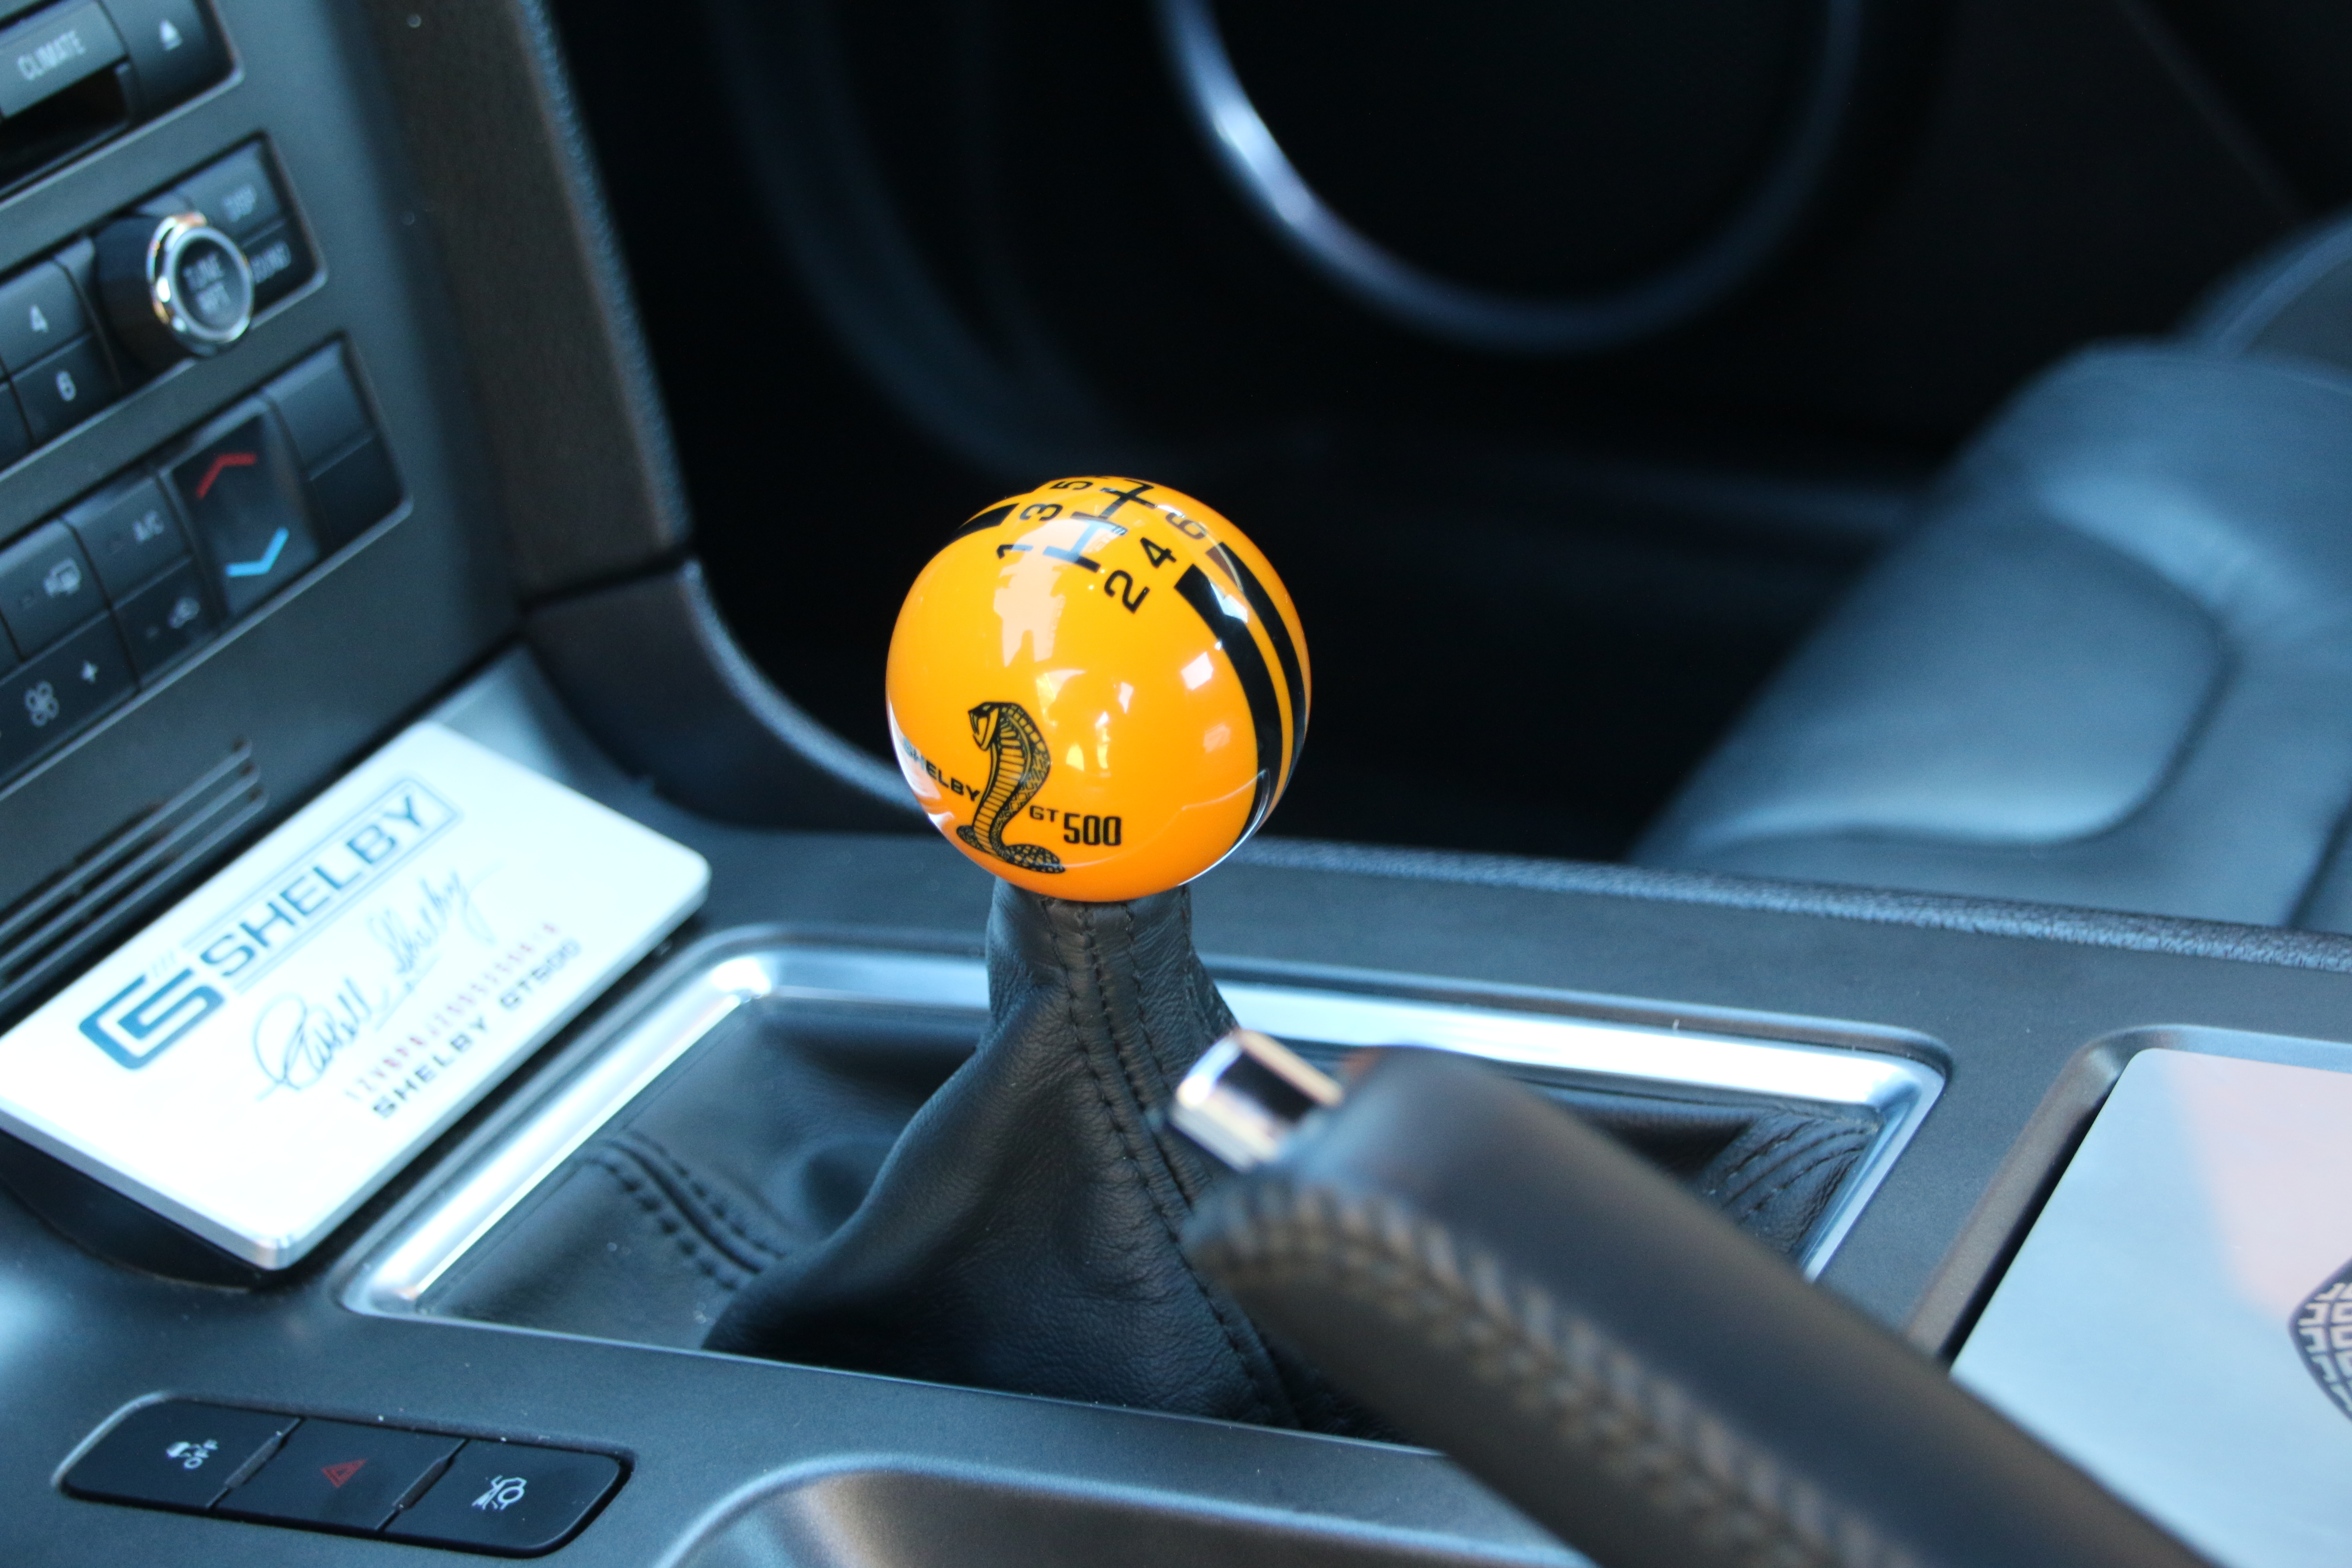
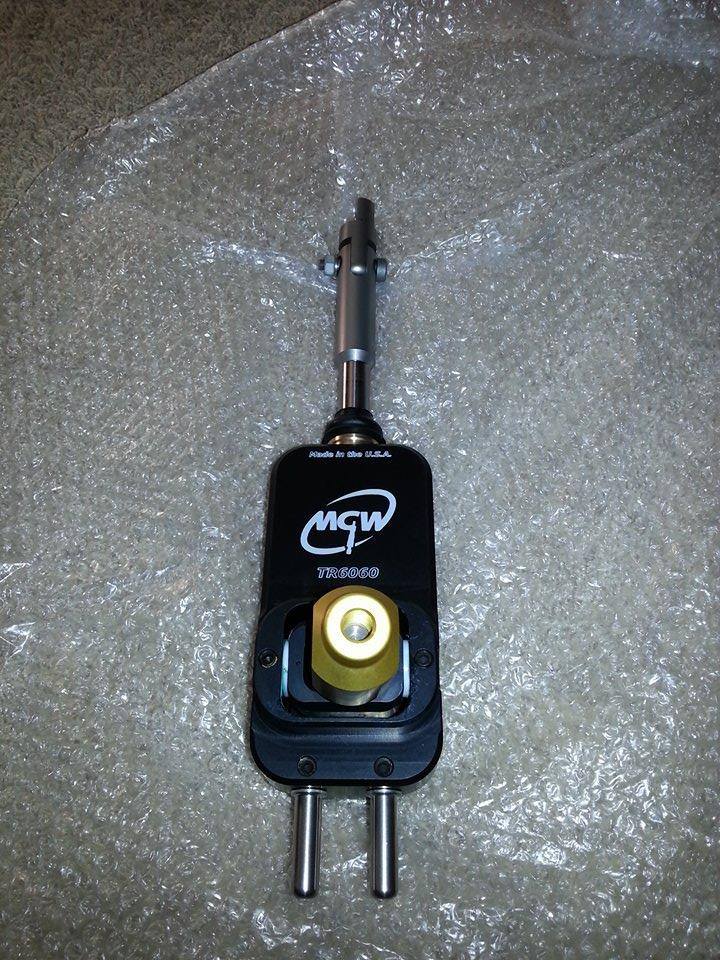
After I upgraded to the Borlas, I then focused on appearance mods (more on those later) but in the fall of 2014, I got word that MGW who make the best shifter in the world had just released a Generation II version of their famous shifter for the 2013/14 Shelby GT500. The stock shifter on the Shelby is pretty good but one of my fellow Shelby friends had one of the original first generation MGW shifters installed and it felt great. It had a nice short throw and was so precise, so it quickly went on my Wish List. As soon as a new Gen II version was released, it was the only trigger I needed. I got the shifter installed in March of 2015 and it is a precision piece of engineering. I chose to install the race track specification rubber bushings – they are a bit tighter than the standard road one but they will tolerate the fastest possible shifting of the gears through the box without a single hiccup or false shift.
The MGW Gen II Shifter and my new Shelby shift knob.
The precision engineering behind this shifter is awesome!
MGWs Gen II Shifter for the 2013/14 Shelby GT500 – beautifully engineered!
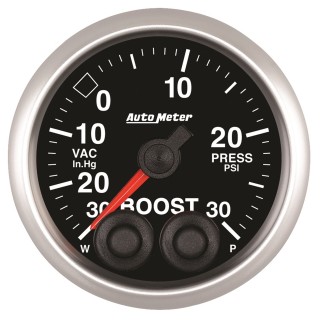
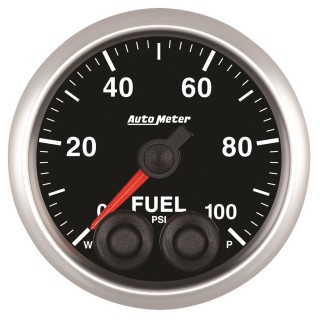
The next mod I did was to add a three Auto Meter Elite gauges in the driver-side A pillar using a tri-gauge pod from Lethal Performance. The Auto Meter Elite gauges are impressive and look really slick! I chose them because they have programmable colored LED lighting. You can set the LED default color then have it change when a user-defined low or high value is reached. So for the Vac-Boost gauge for example, the gauge is displays dark blue in normal more but switches to red as soon as the car goes into boost at or above zero psi. You can also set high and low warning thresholds and the gauge will flash if the value reaches that number.
For the three gauges I chose Vacuum/Boost, Wideband Fuel (Air/Fuel ratio) and Fuel Pressure – the latter two are essential when doing very high-performance tuning on the car as a lean engine or insufficient fuel pressure can cause pre-detonation which can cause serious damage and loss of performance.
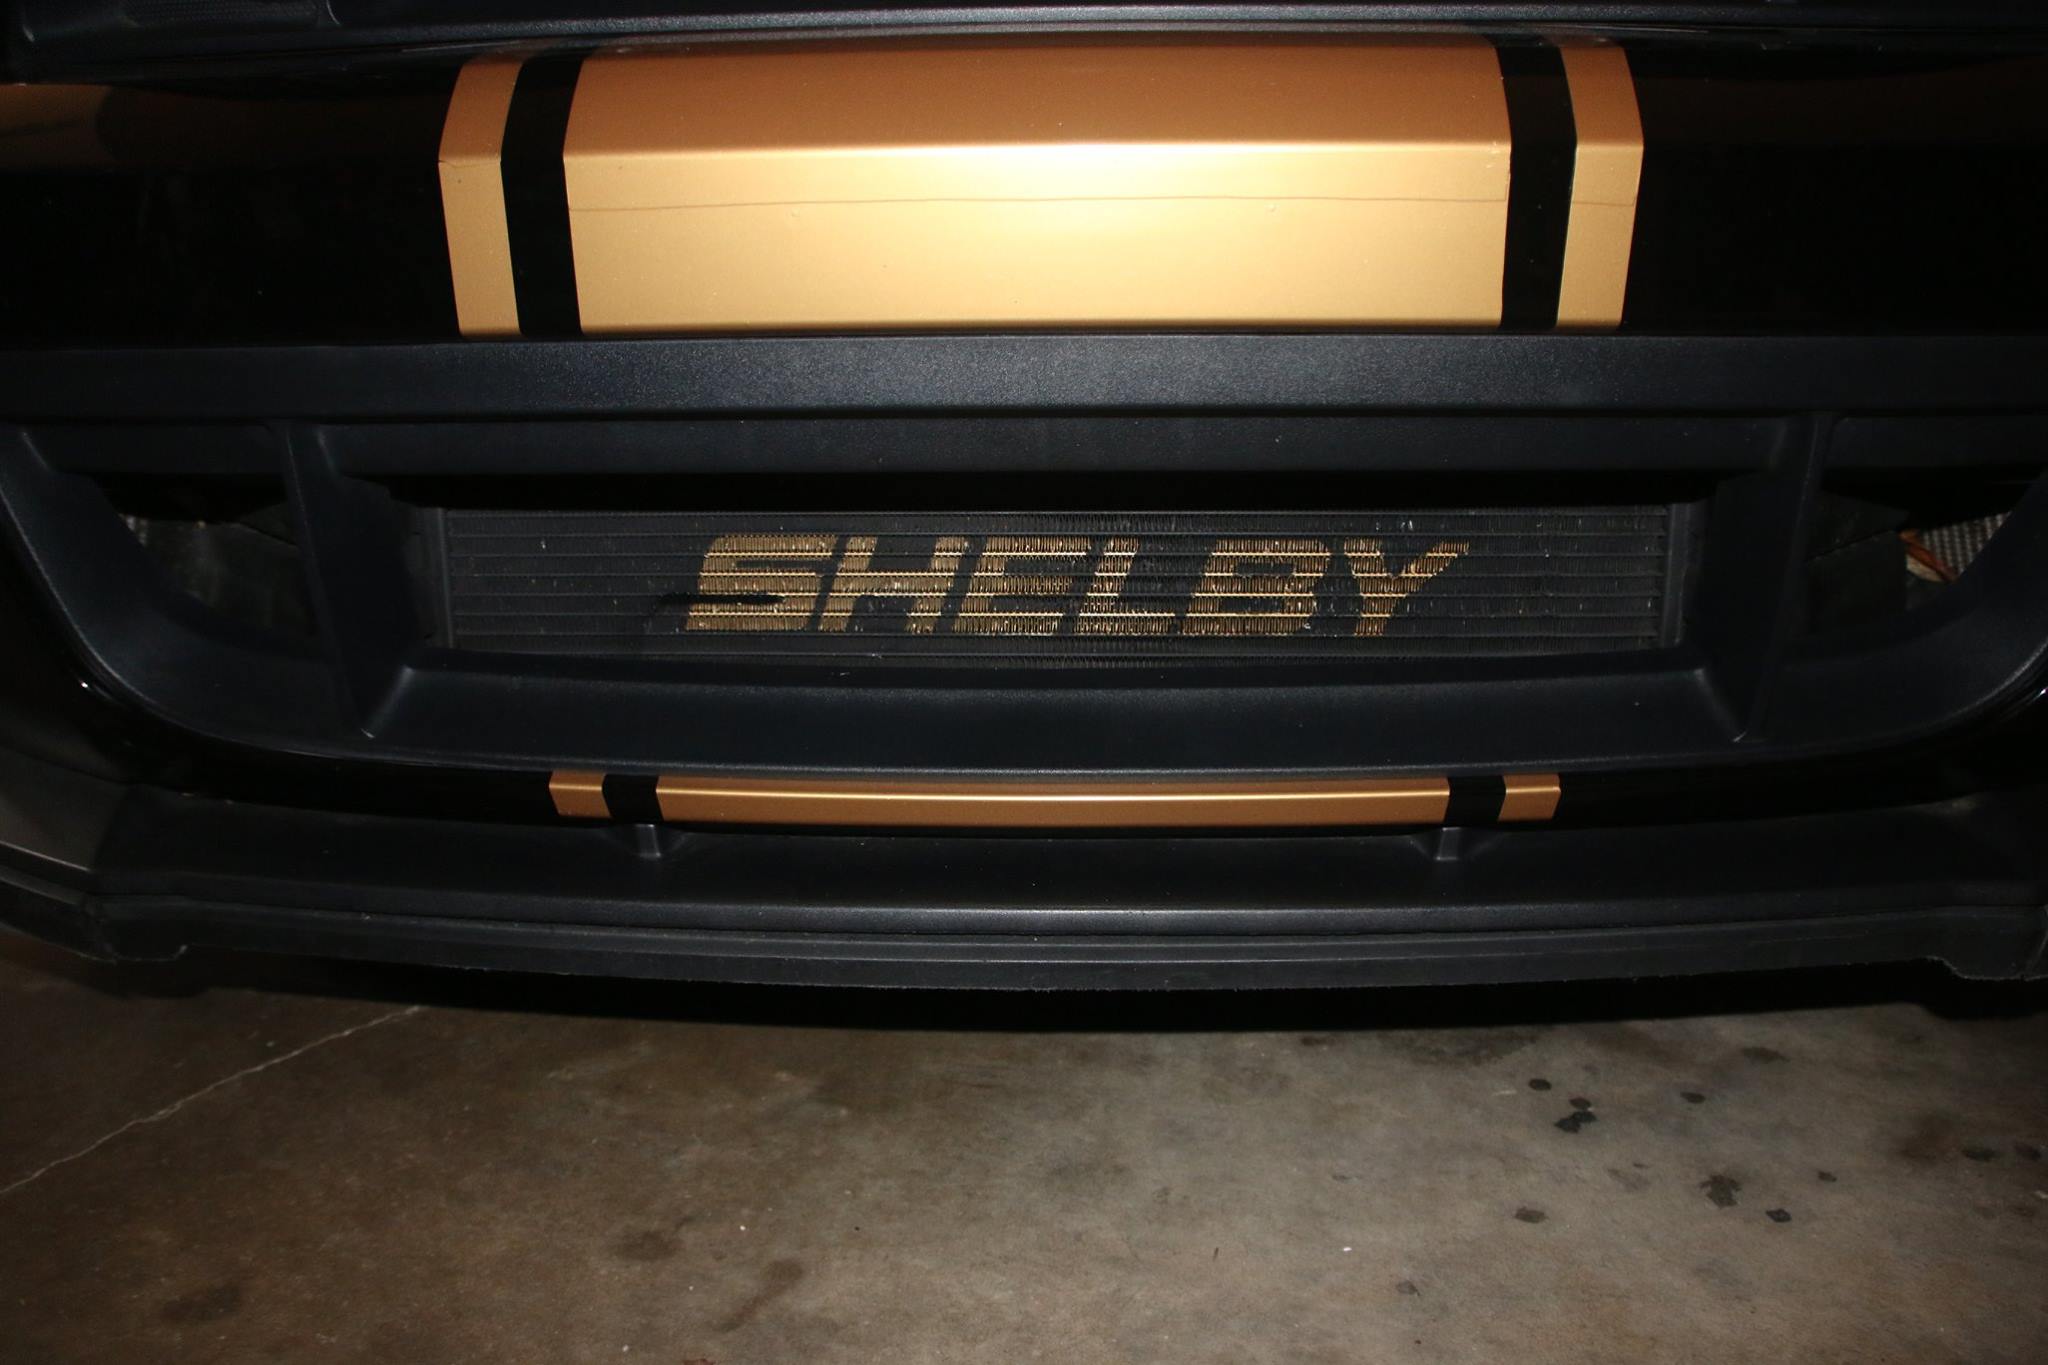
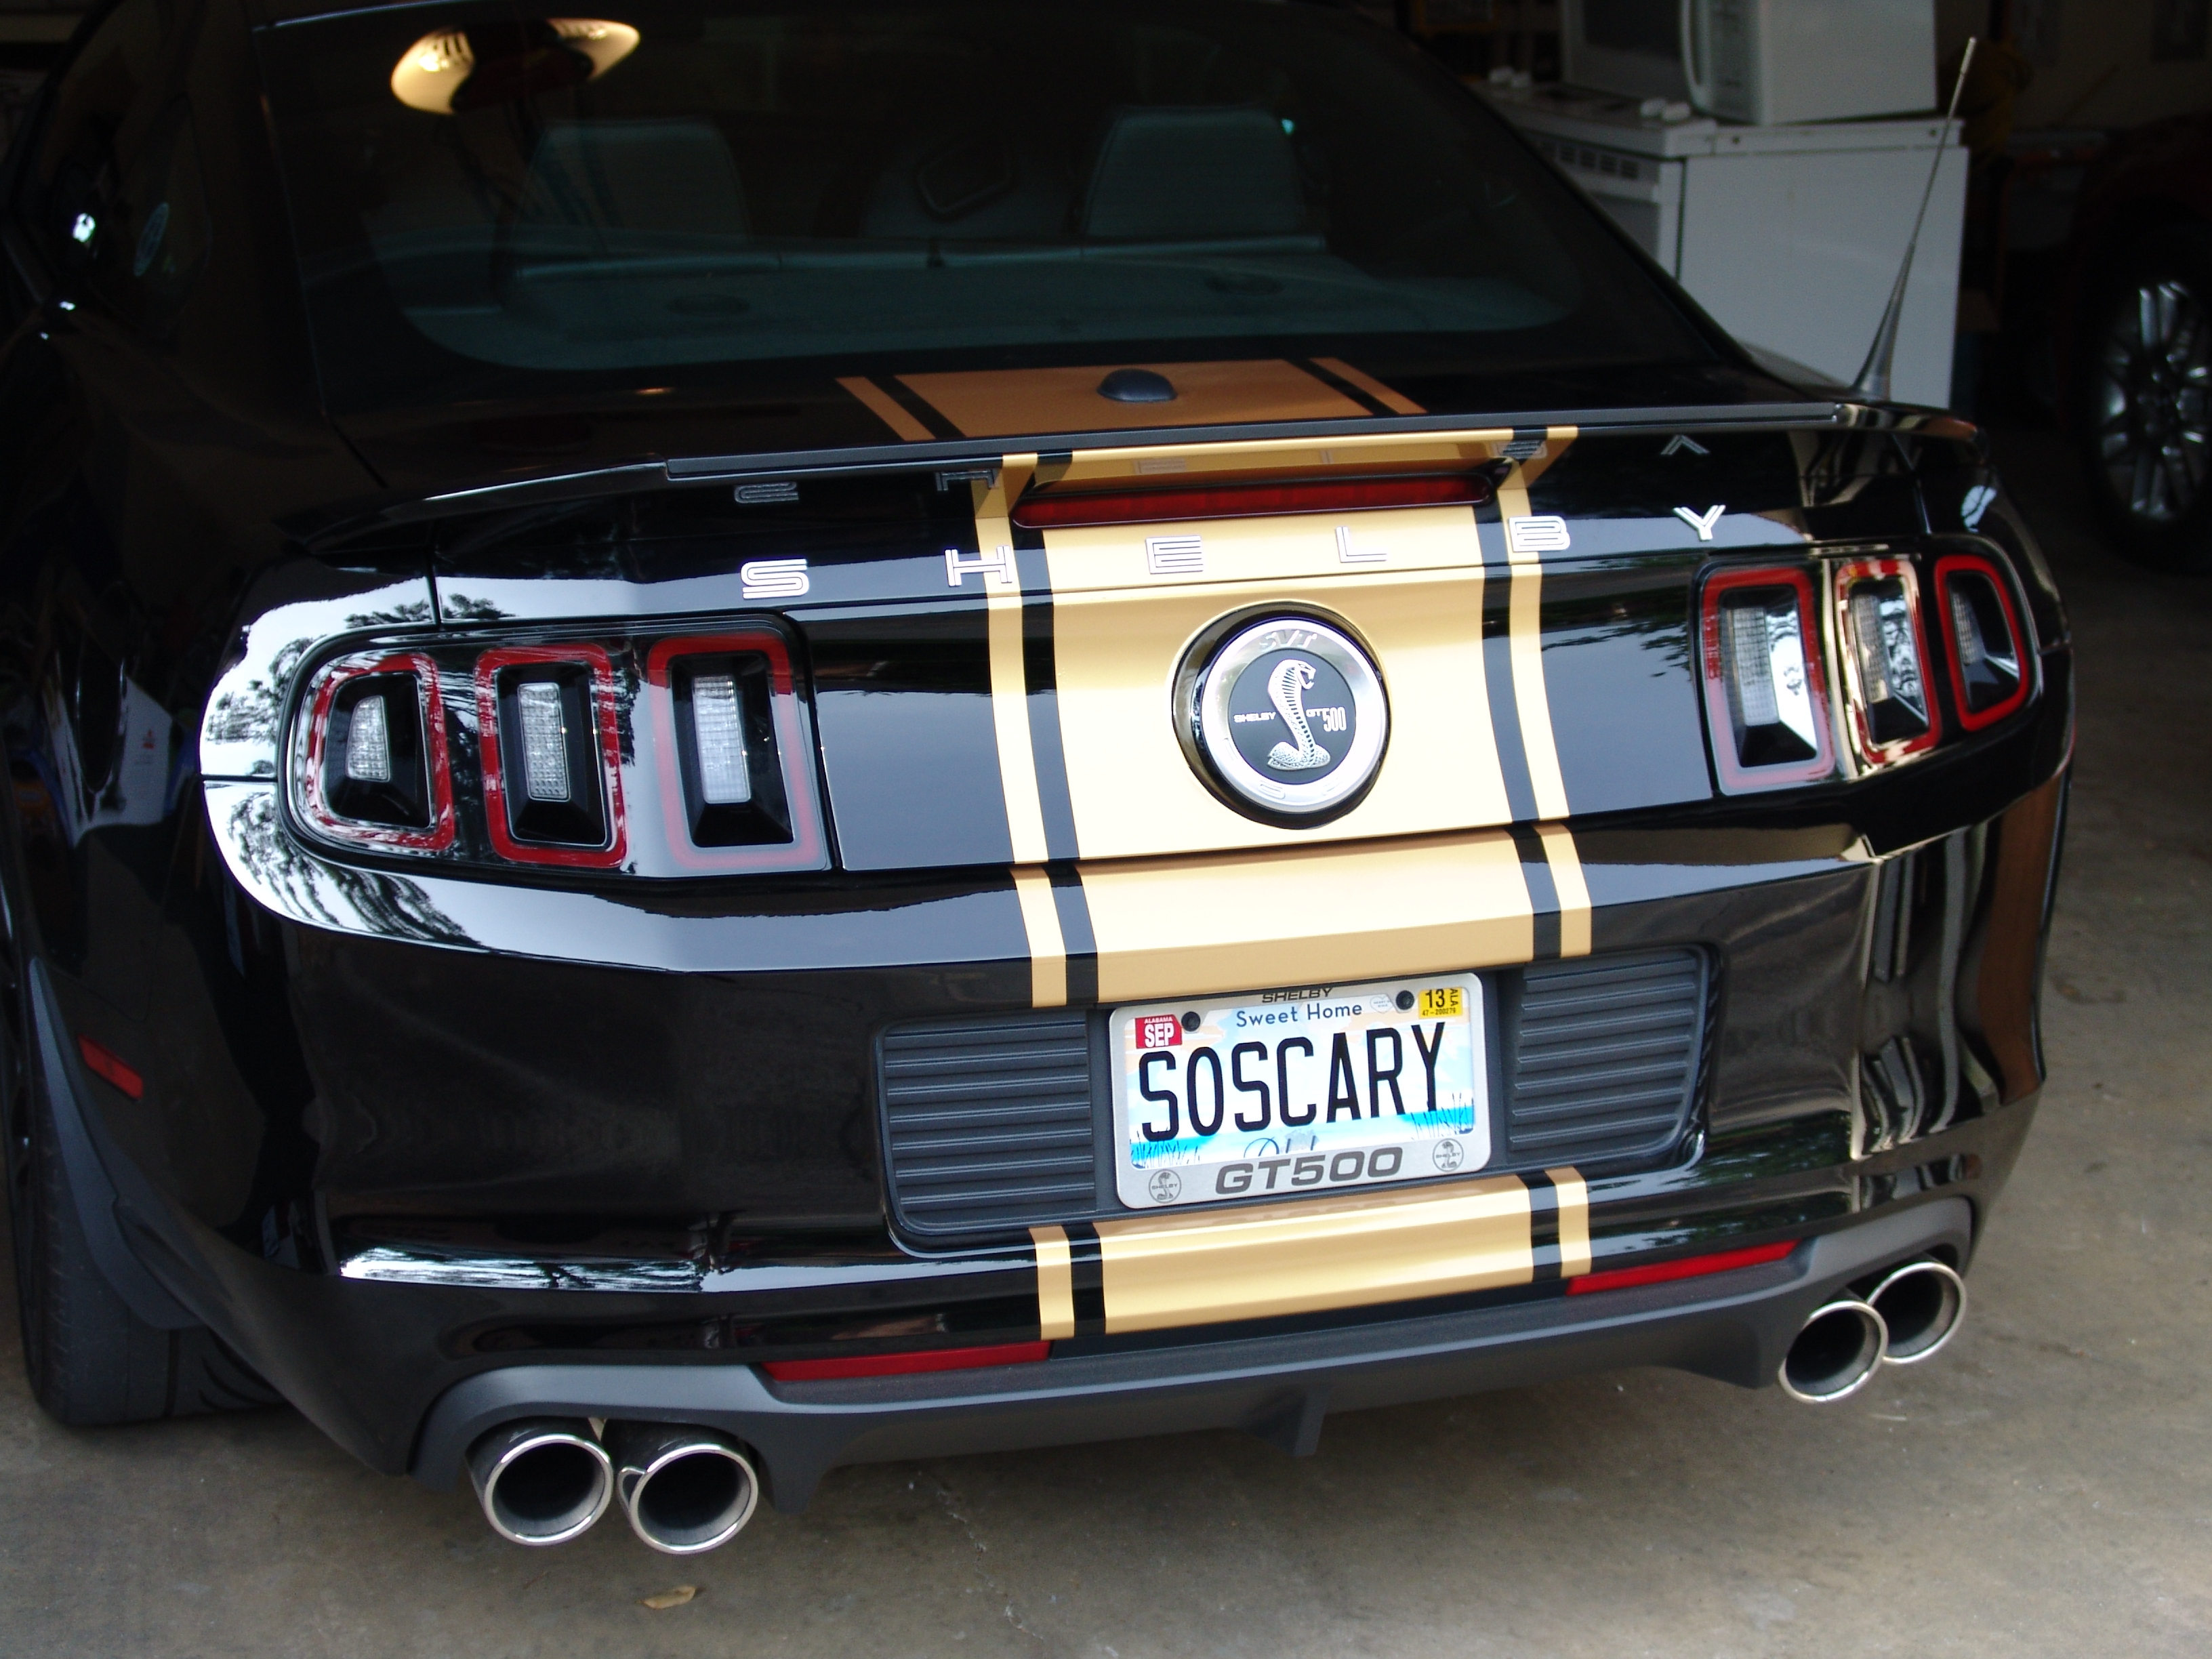
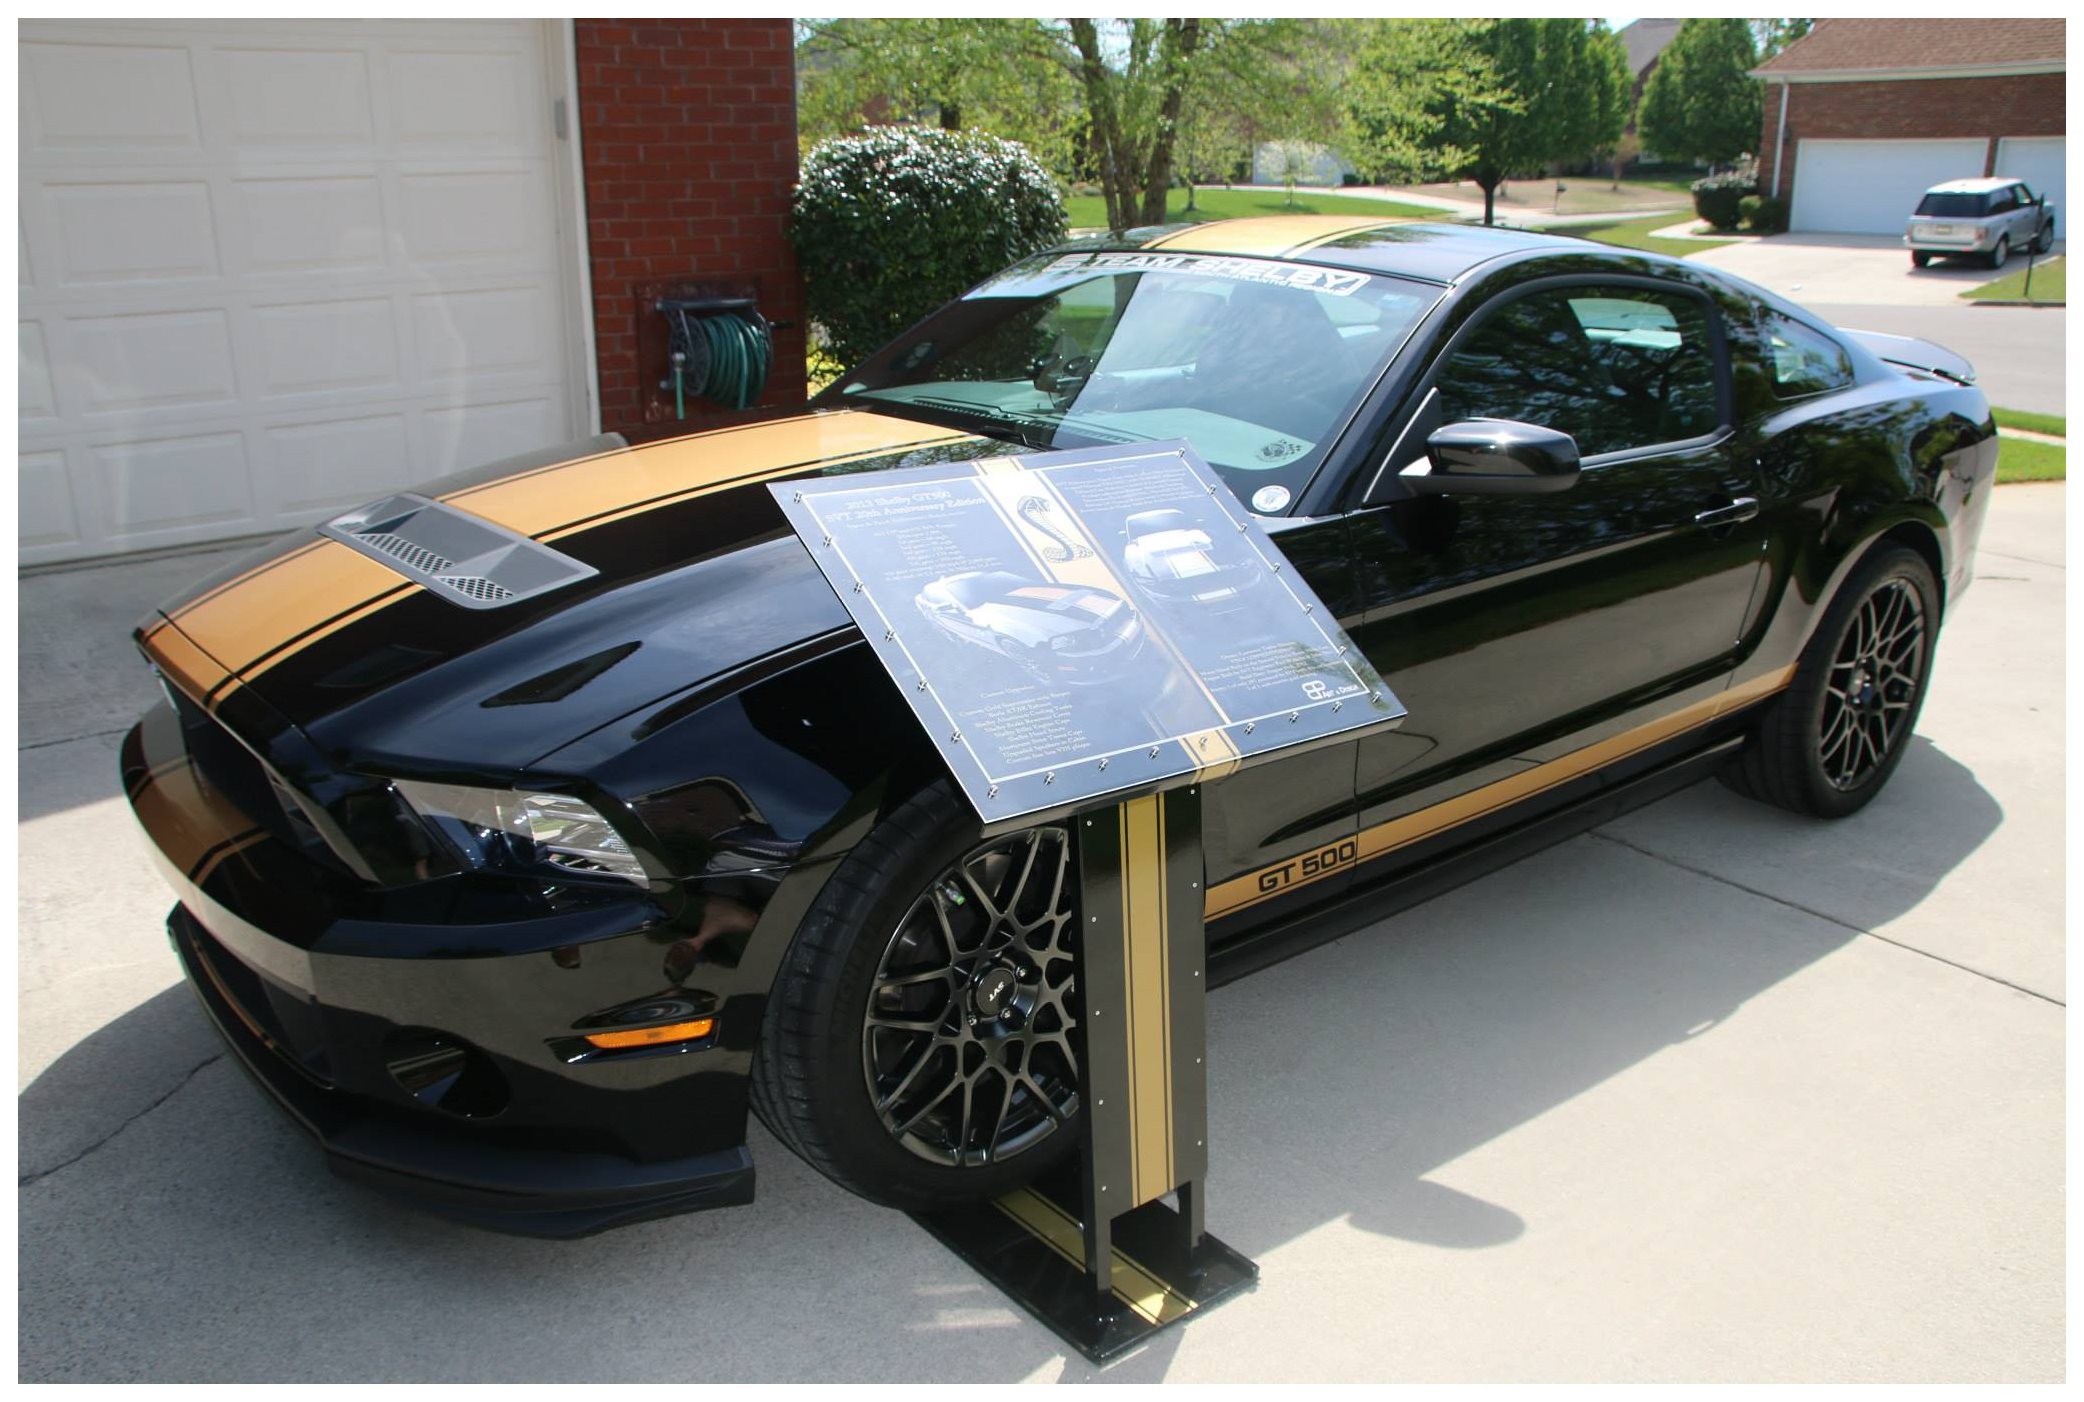
I’ve done a lot of appearance mods since I got SoScary, but the biggest one by far was getting its Gold Stripes. The car had no stripes at all when I got it (“stripe delete”) and I waited 8 months before finally making a decision to stripe the car. I looked at a lot of stripe samples, types and colors before finally deciding to get Shelby Supersnake style gold stripes. Gold stripes on a Shelby are very rare to begin with and on a 2013 GT500, I might have the only one. The results were simply stunning….
SoScary’s new Gold Stripes!
Here is a rear view of it in my garage bay.
Nice ass!
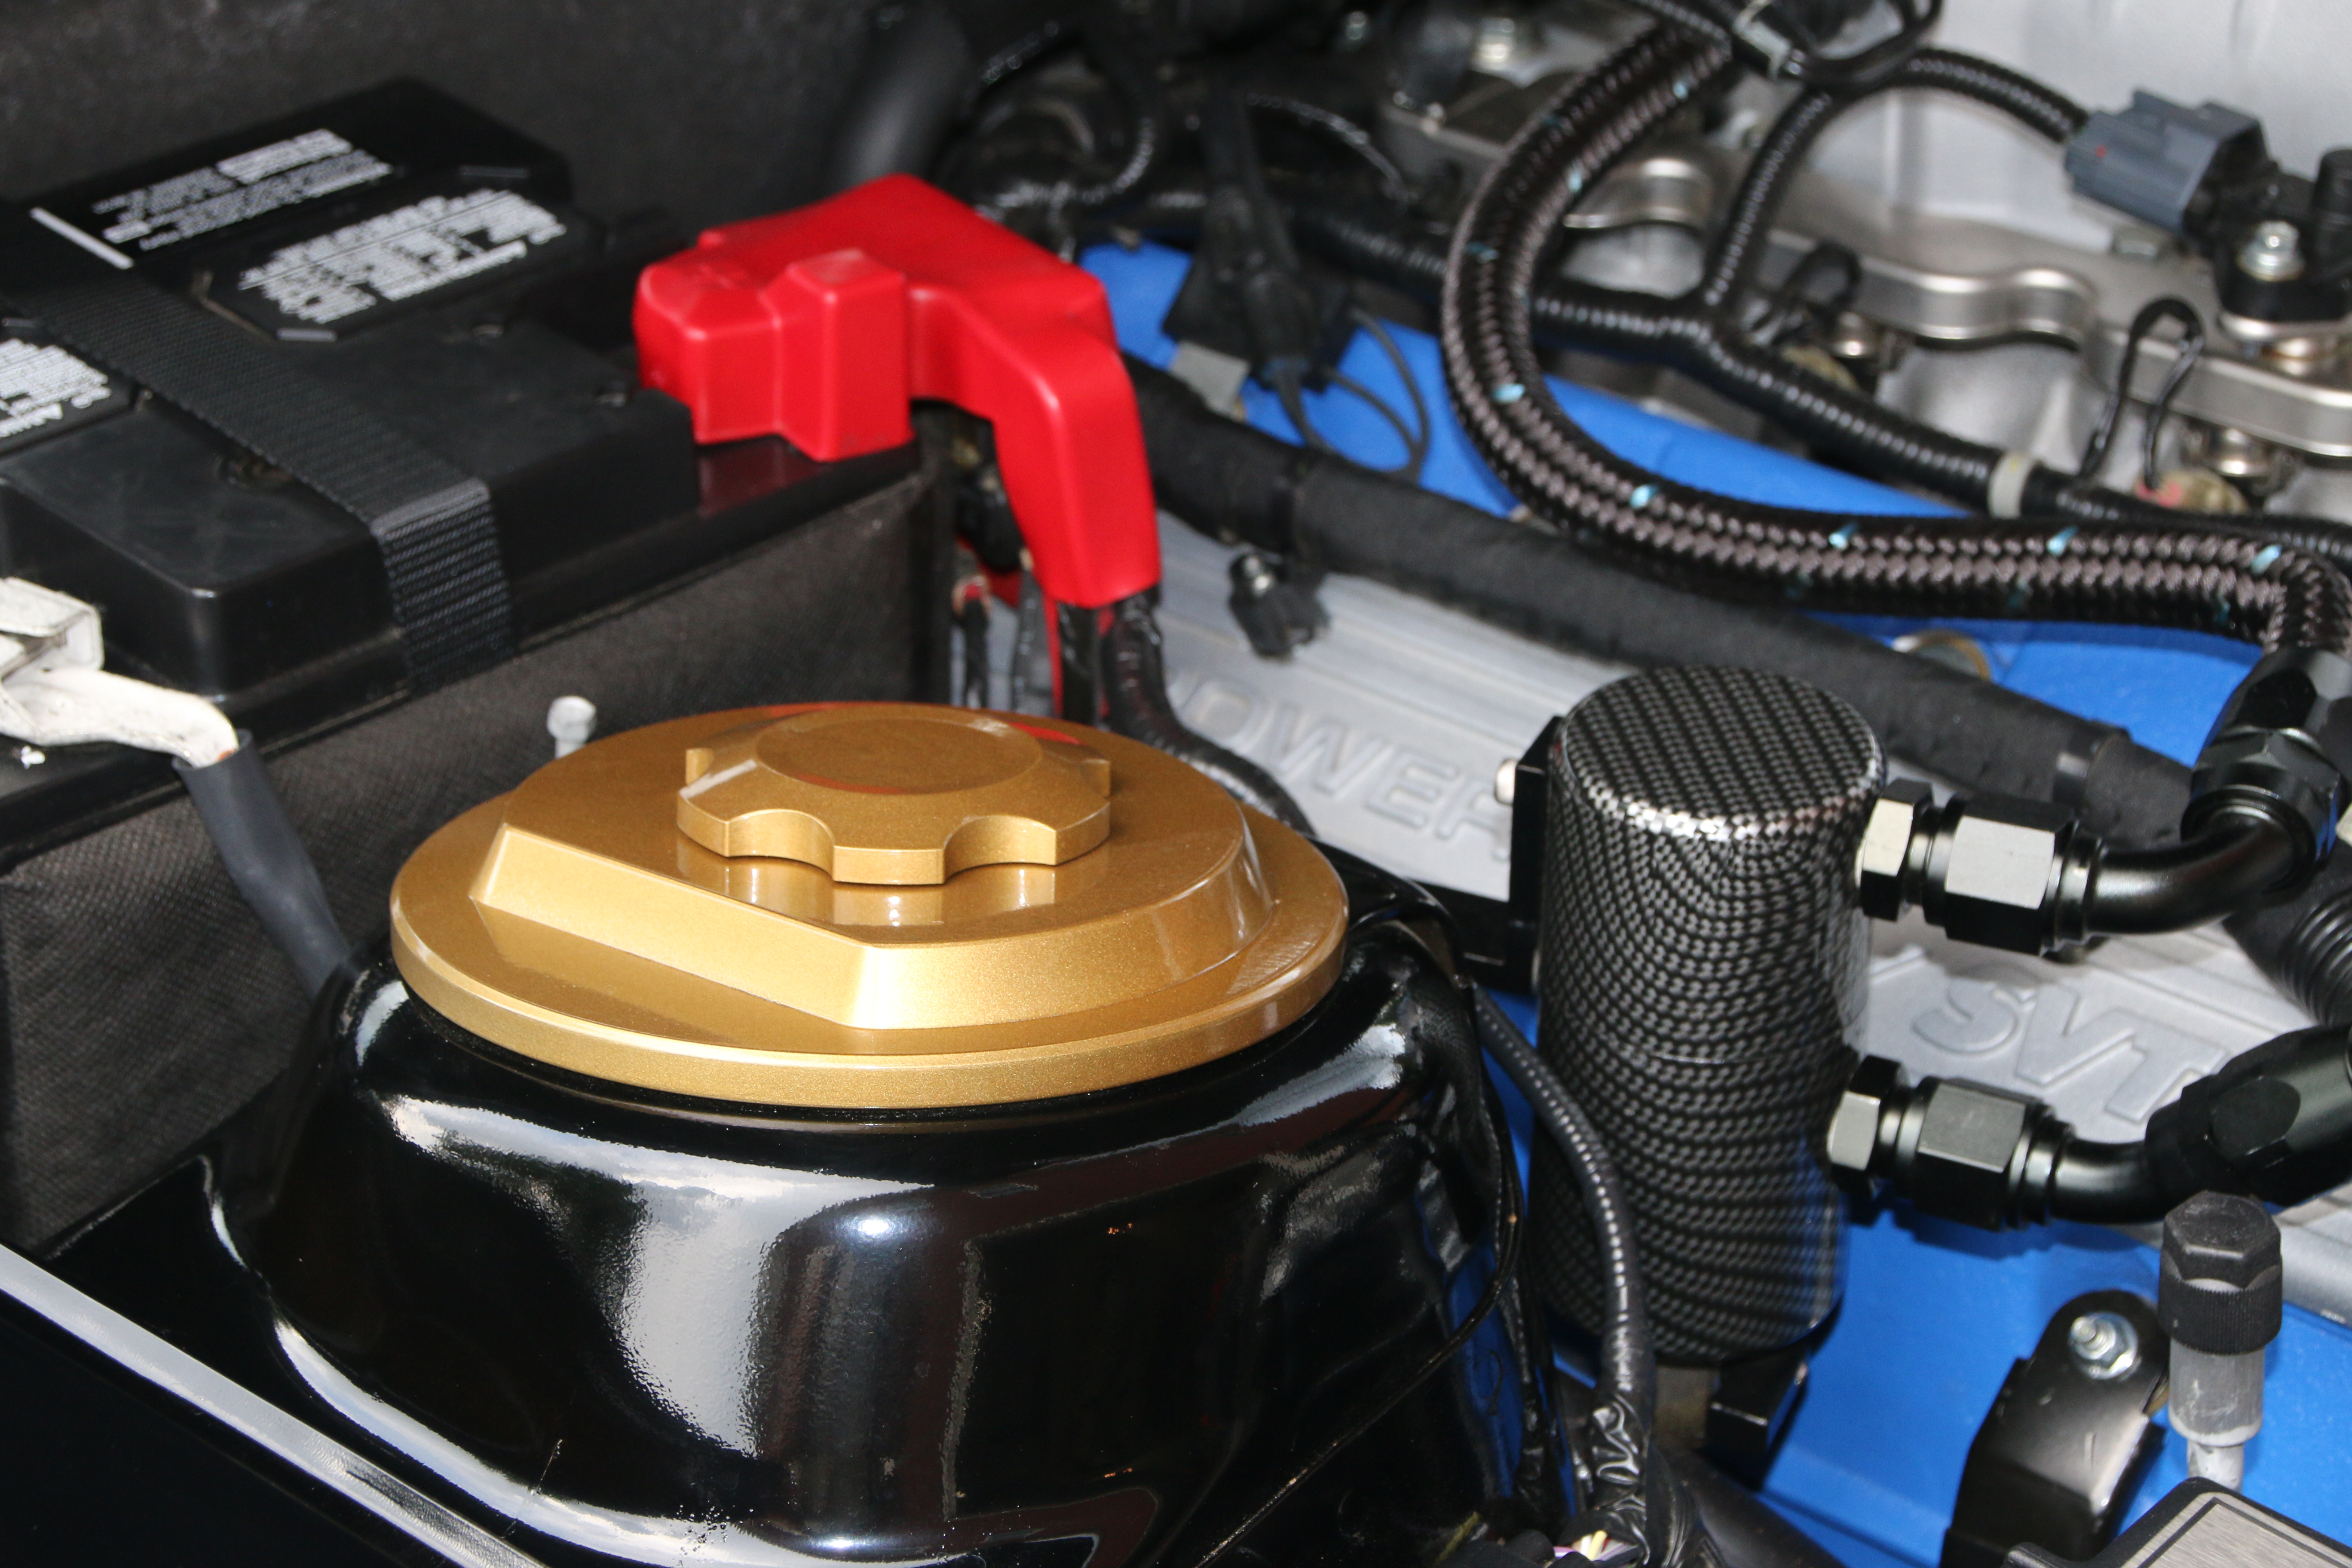
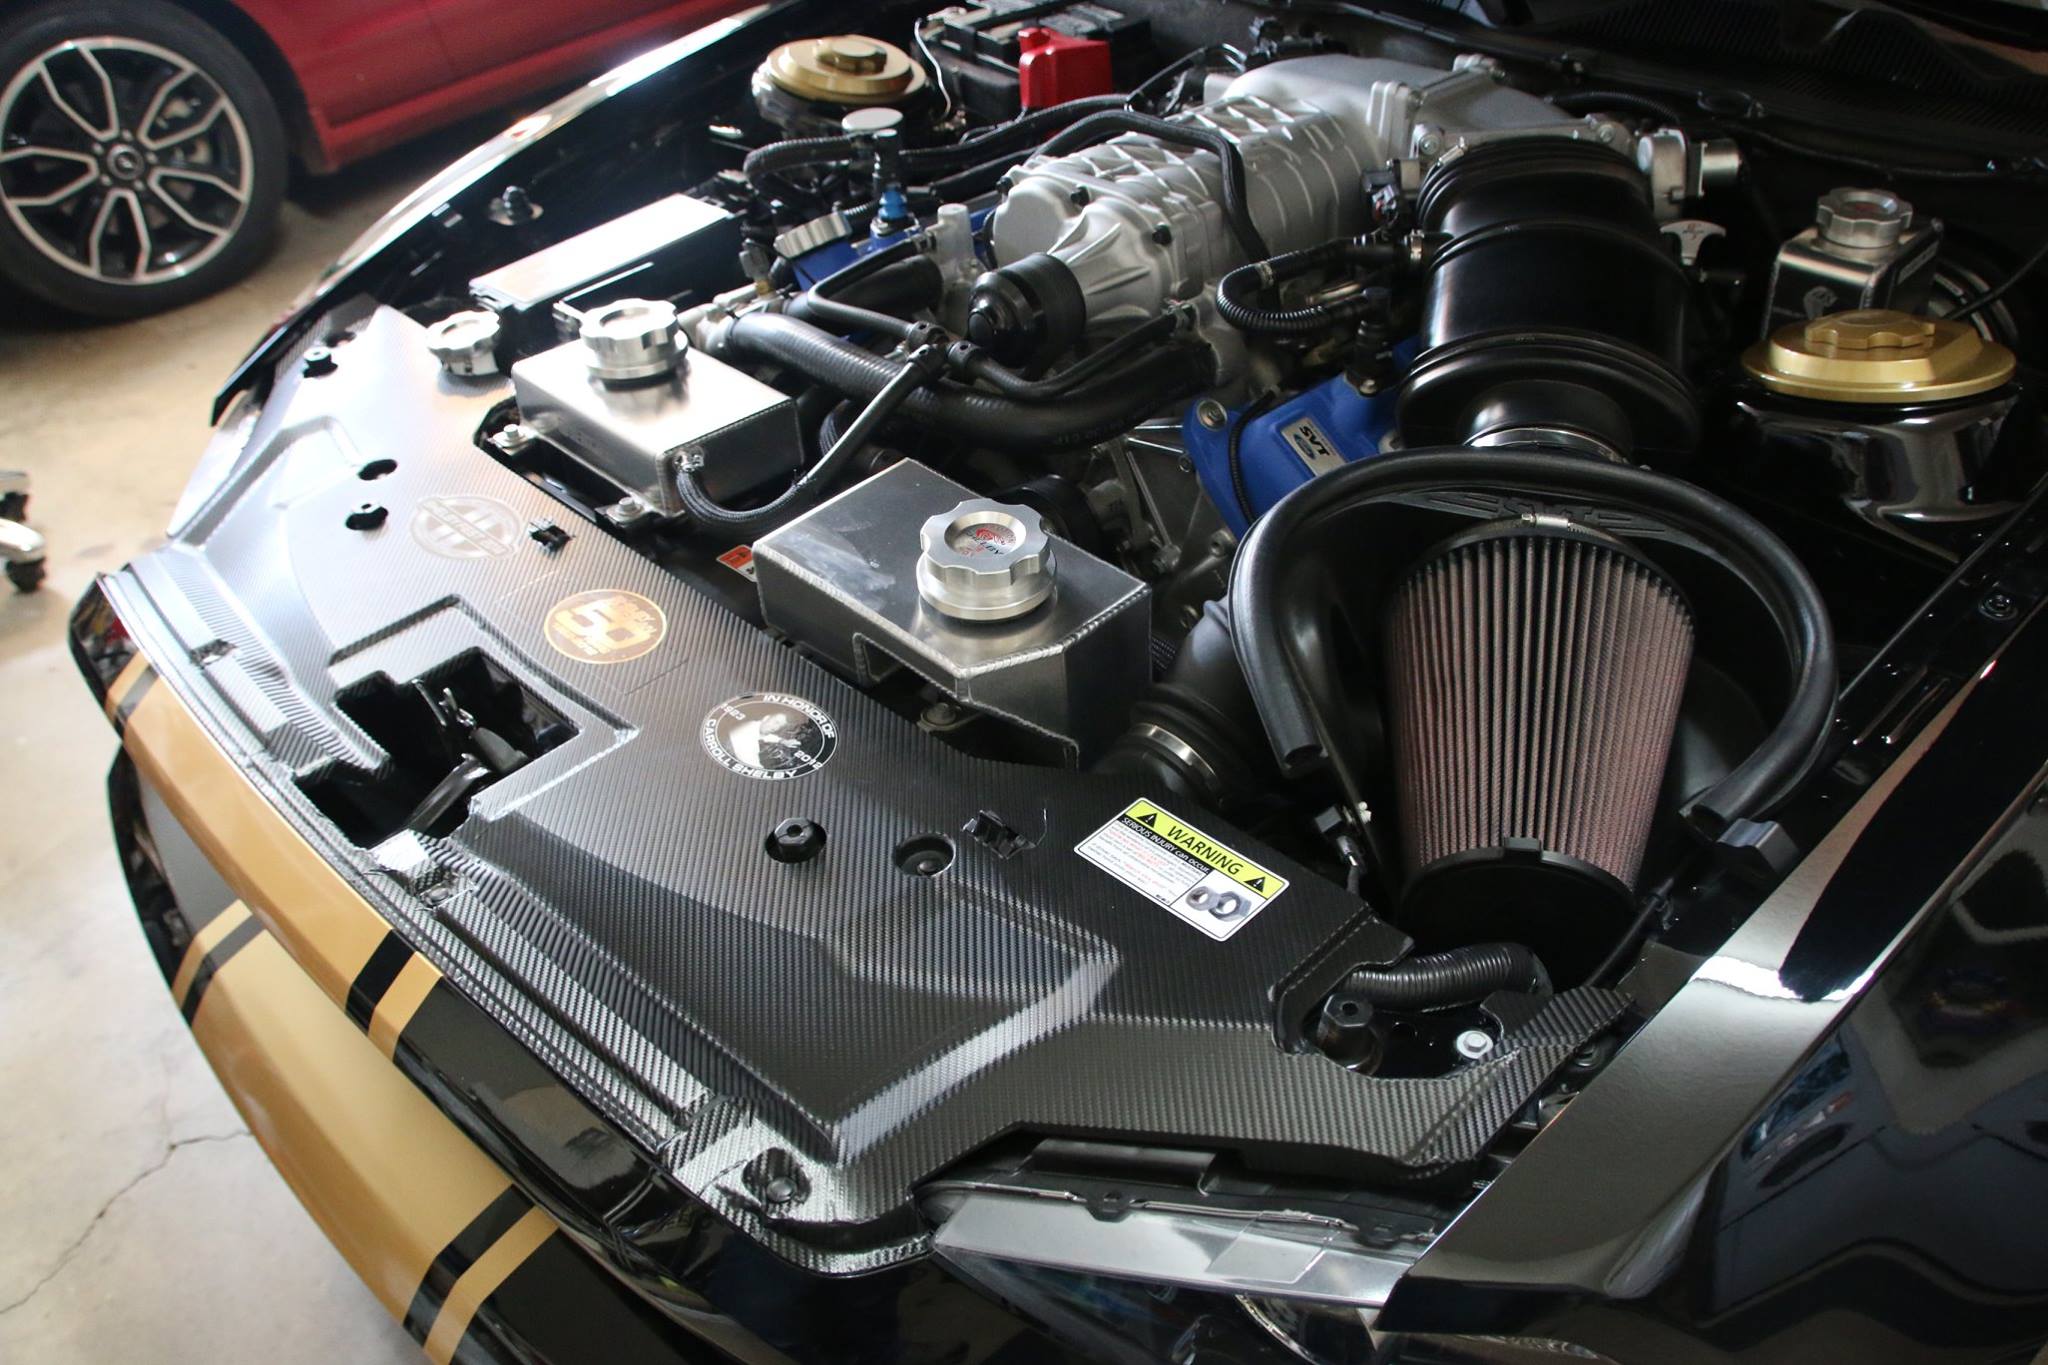
The Engine bay has had a lot of attention too – matching custom gold strut tower covers, Shelby billet aluminum cooling tanks and brake reservoir cover, Shelby billet aluminum caps and a Bob’s Oil Separator.
Gold Strut Tower covers
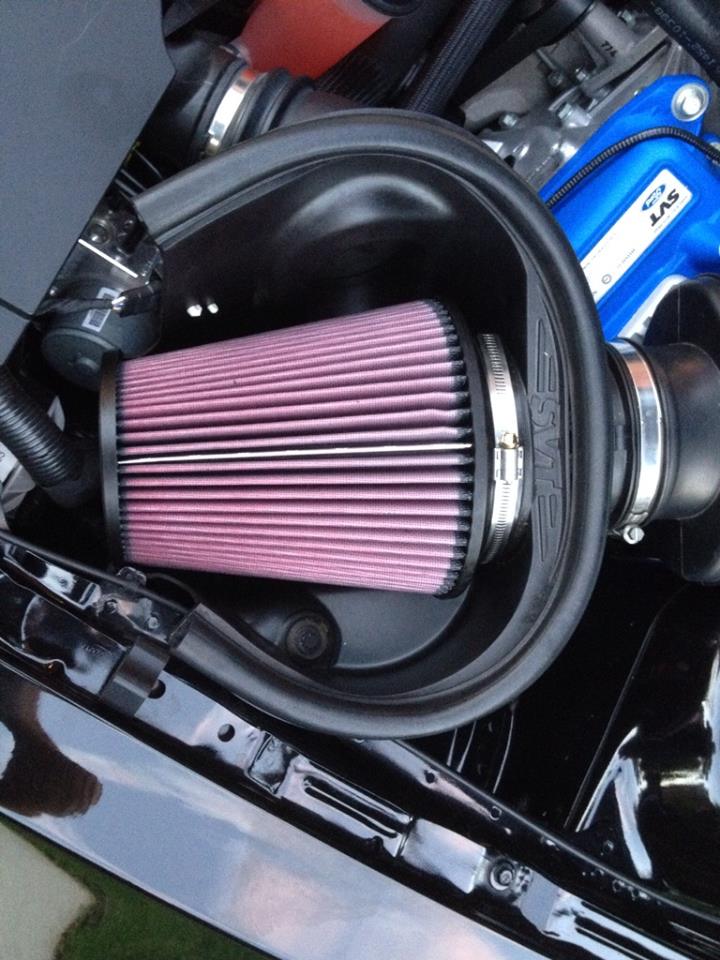
This K&N air filter upgrade replaced the OEM paper one
Shelby Aluminum tanks and Carbon-Fiber radiator cover
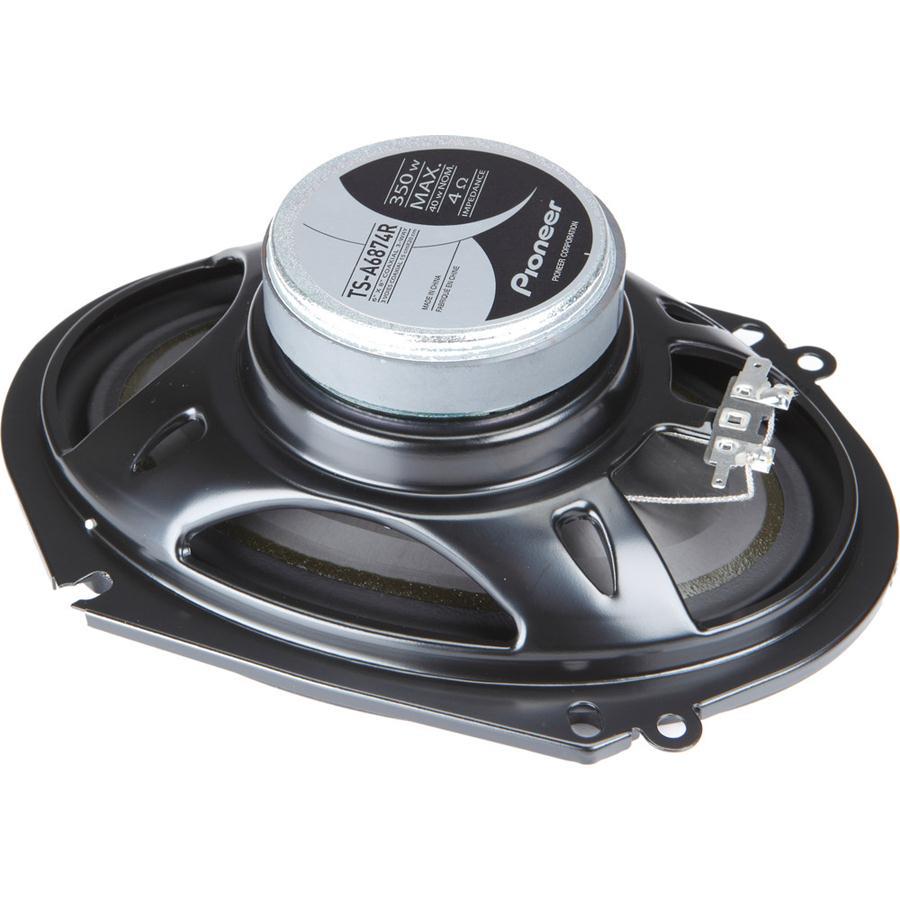
The cabin got a lot of upgrades too. The stock speakers in the front doors were replaced with heavy duty dual Pioneer speakers and additional acoustic padding was added to the doors. This greatly improved the sound stage and upper end.
Pioneer speaker upgrade
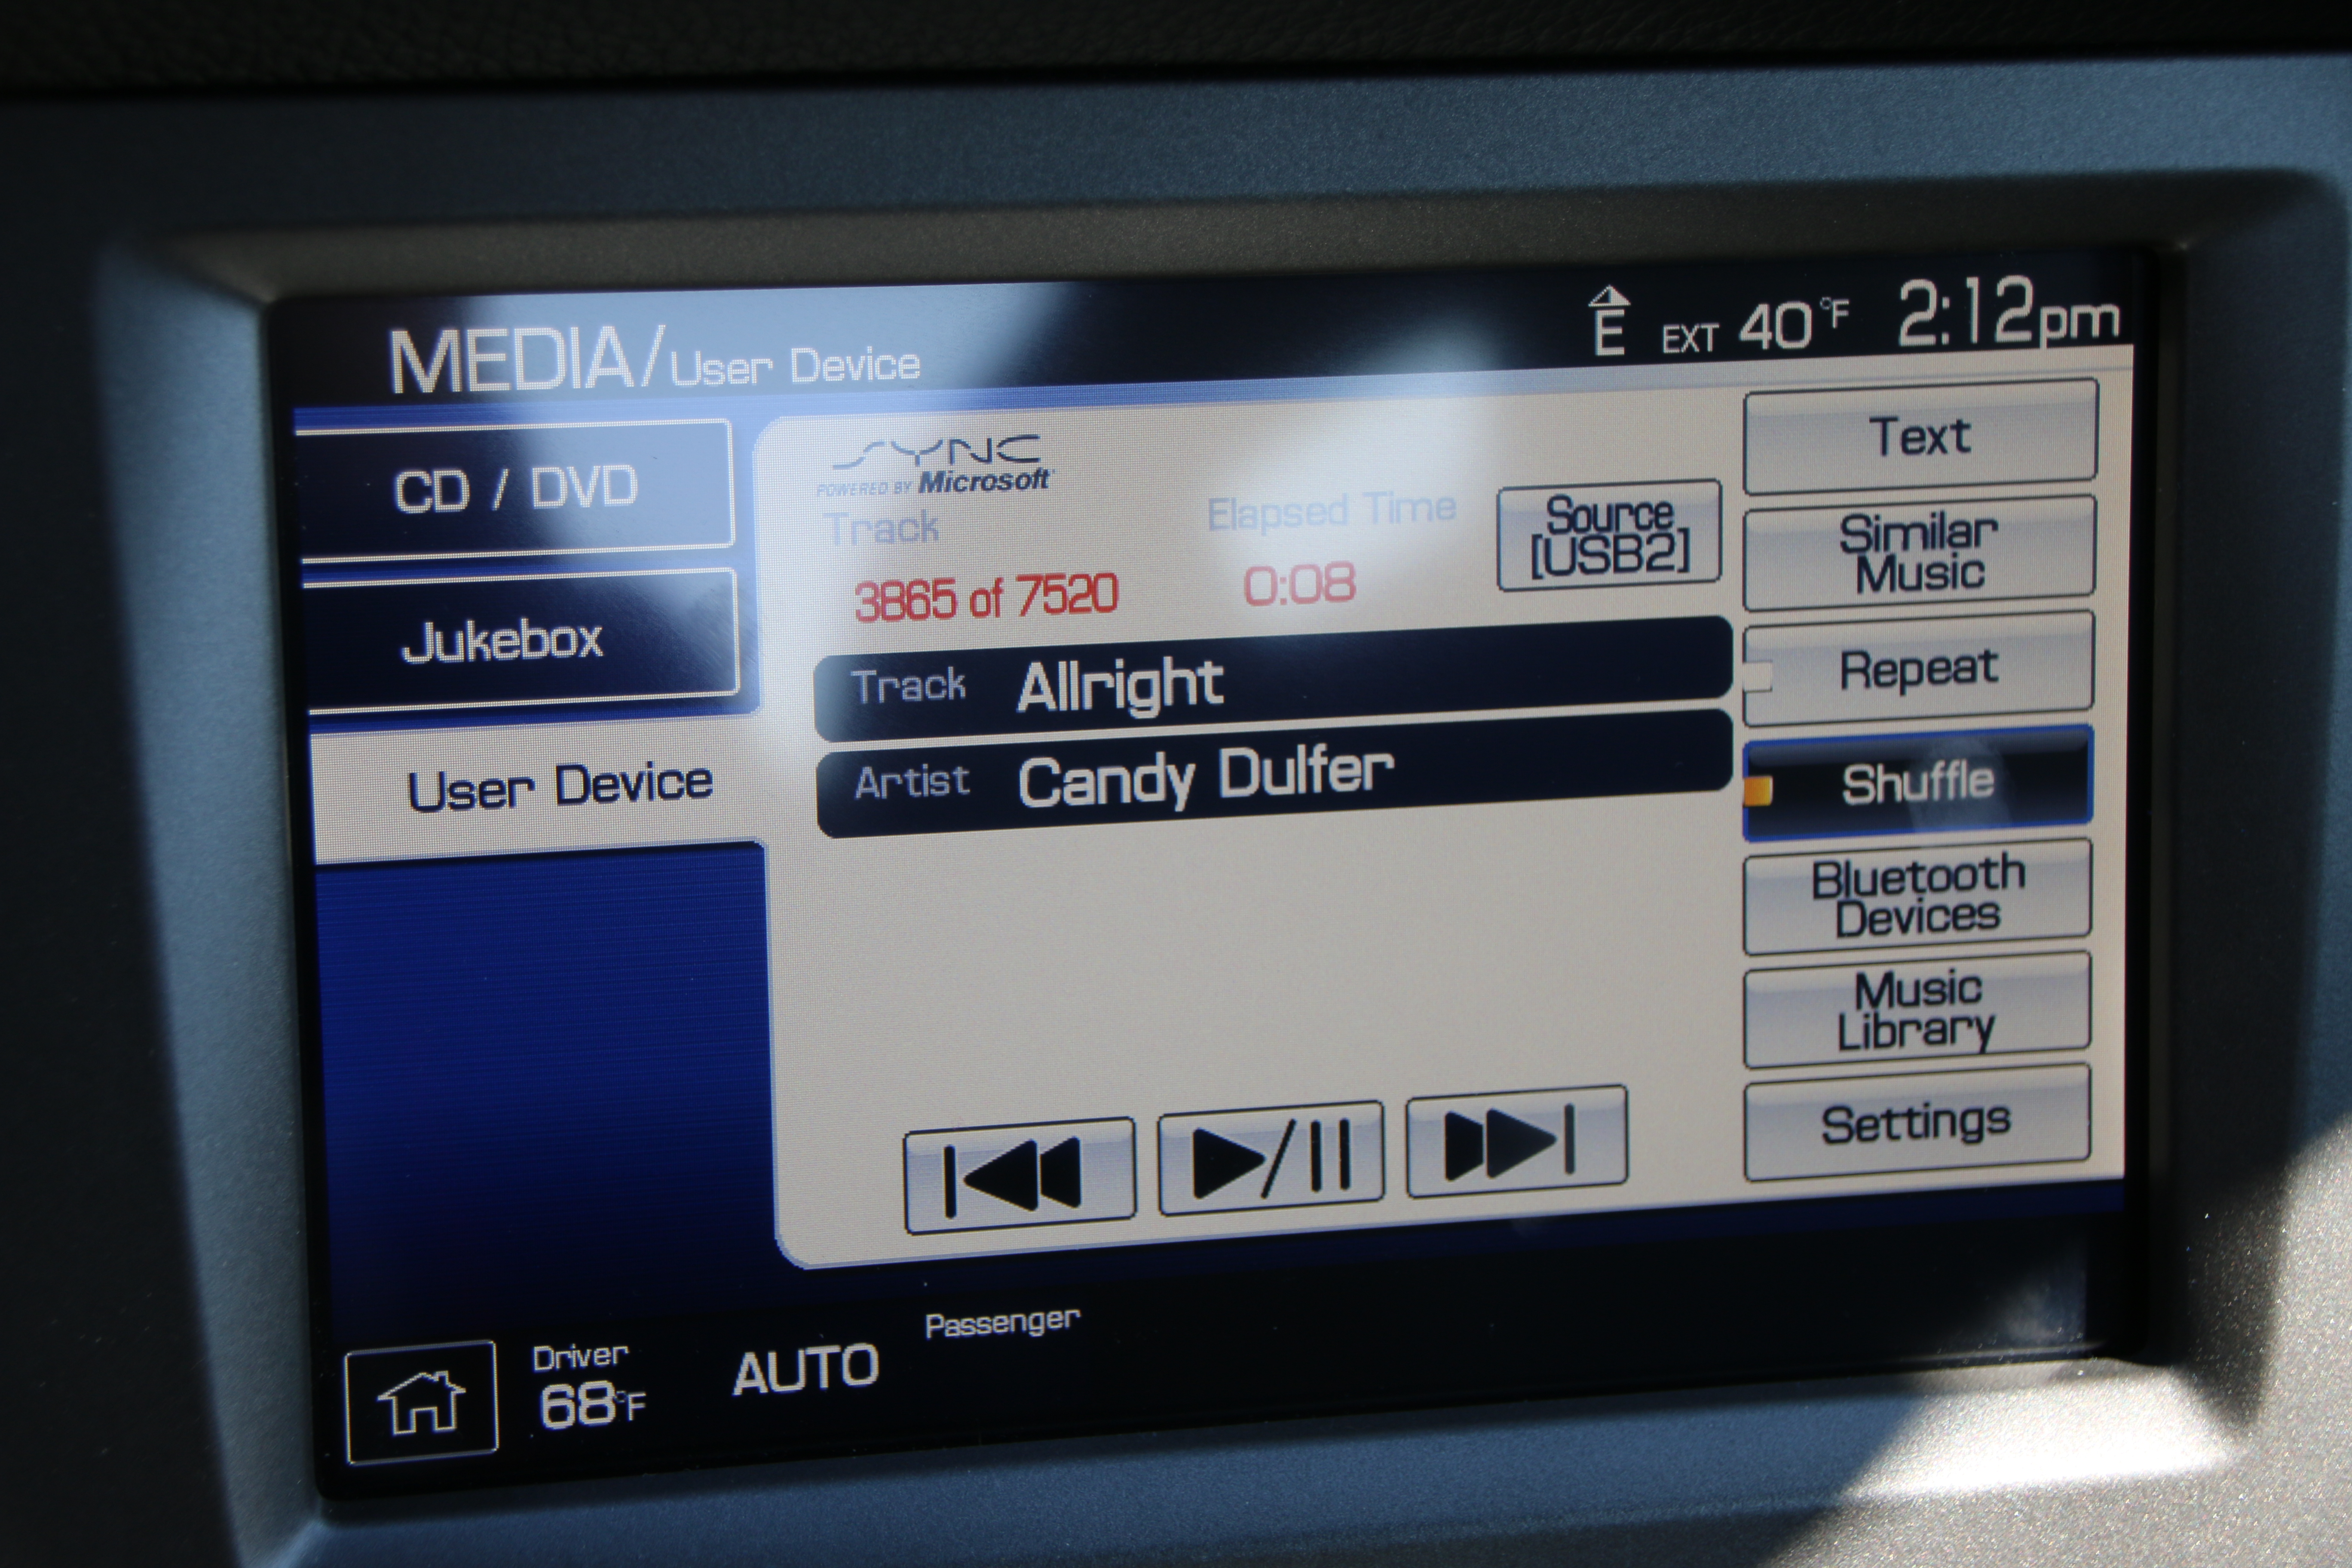
I also discovered a second unused USB port in the header unit behind the glove box which was quickly utilized to add a 64GB USB thumb drive loaded with 16,000 MP3s. This is in addition to the jukebox hard drive which has all of my CD’s pre-loaded into it. I now have a vast music library at my fingertips! Over a few months, I deleted a lot of them – some music is not driving music – but I still have over 7,500 MP3’s…
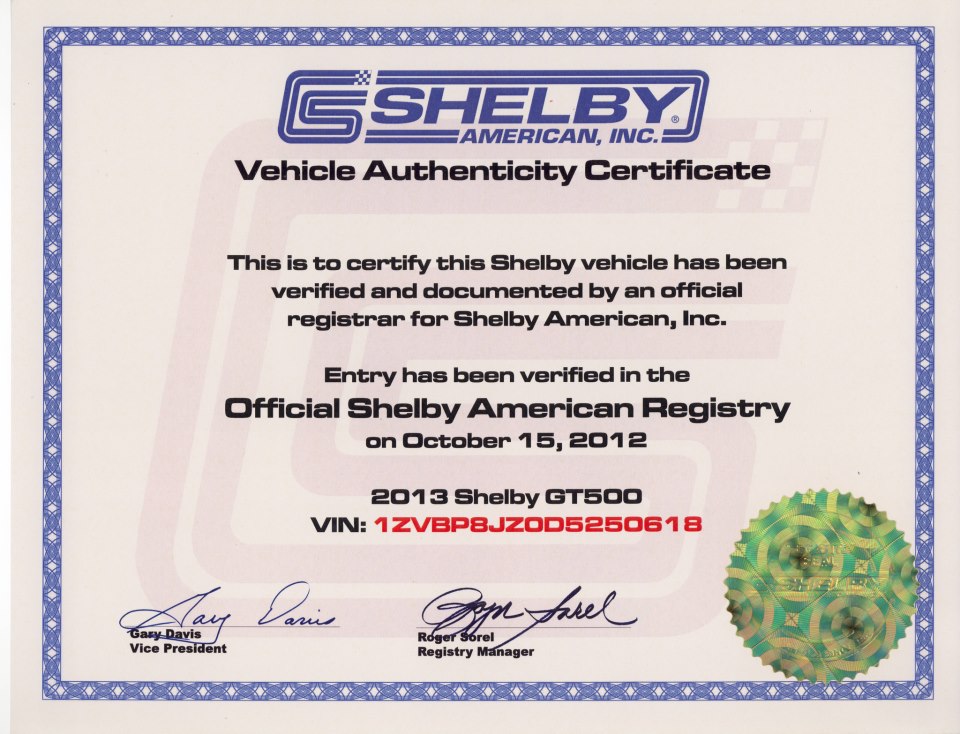
Within days of getting the Shelby, I had discovered Mustang Clubs, Shelby Forums and found a lot of after-market upgrade dealers online such as American Muscle. As if I didn’t know it already I soon realized Mustangs and Shelbys in particular, were no ordinary cars. The whole scene was huge! On the official Shelby American website, I discovered I could get SoScary officially registered so that was one of the first things I did.
Authenticity is everything. My Shelby Authenticity Certificate
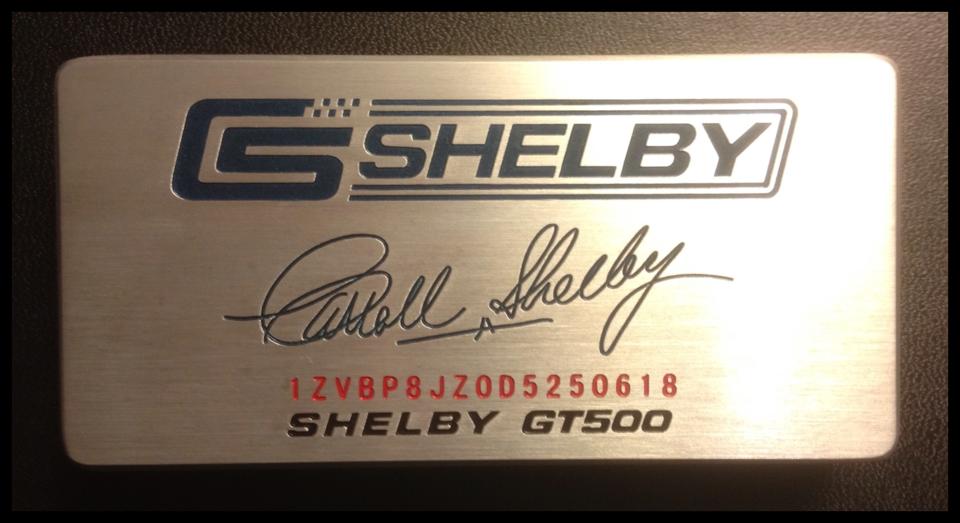
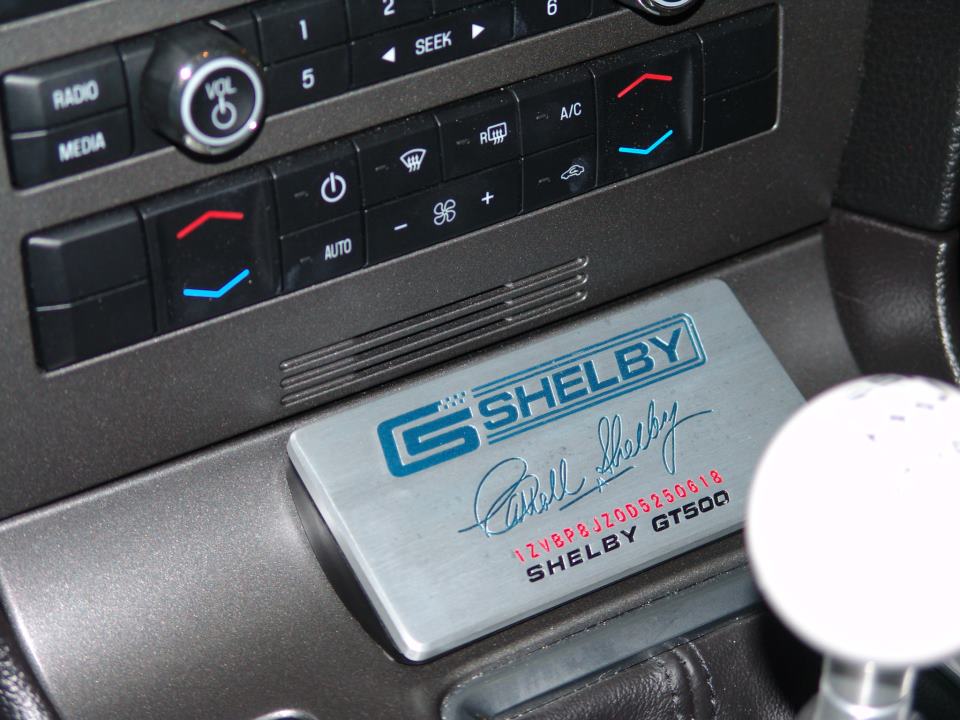
I also ordered an in-dash plaque which looks great!
Here it is in the car..
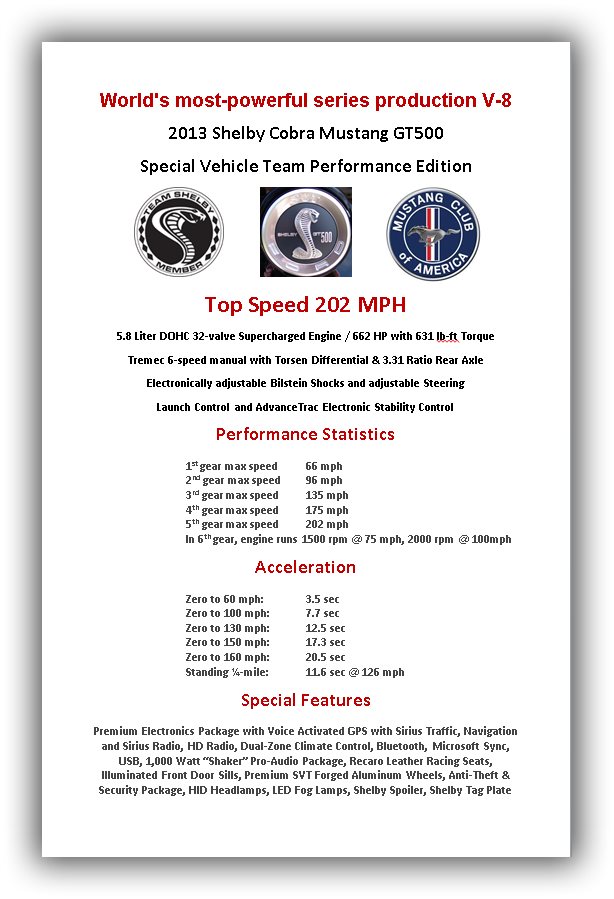
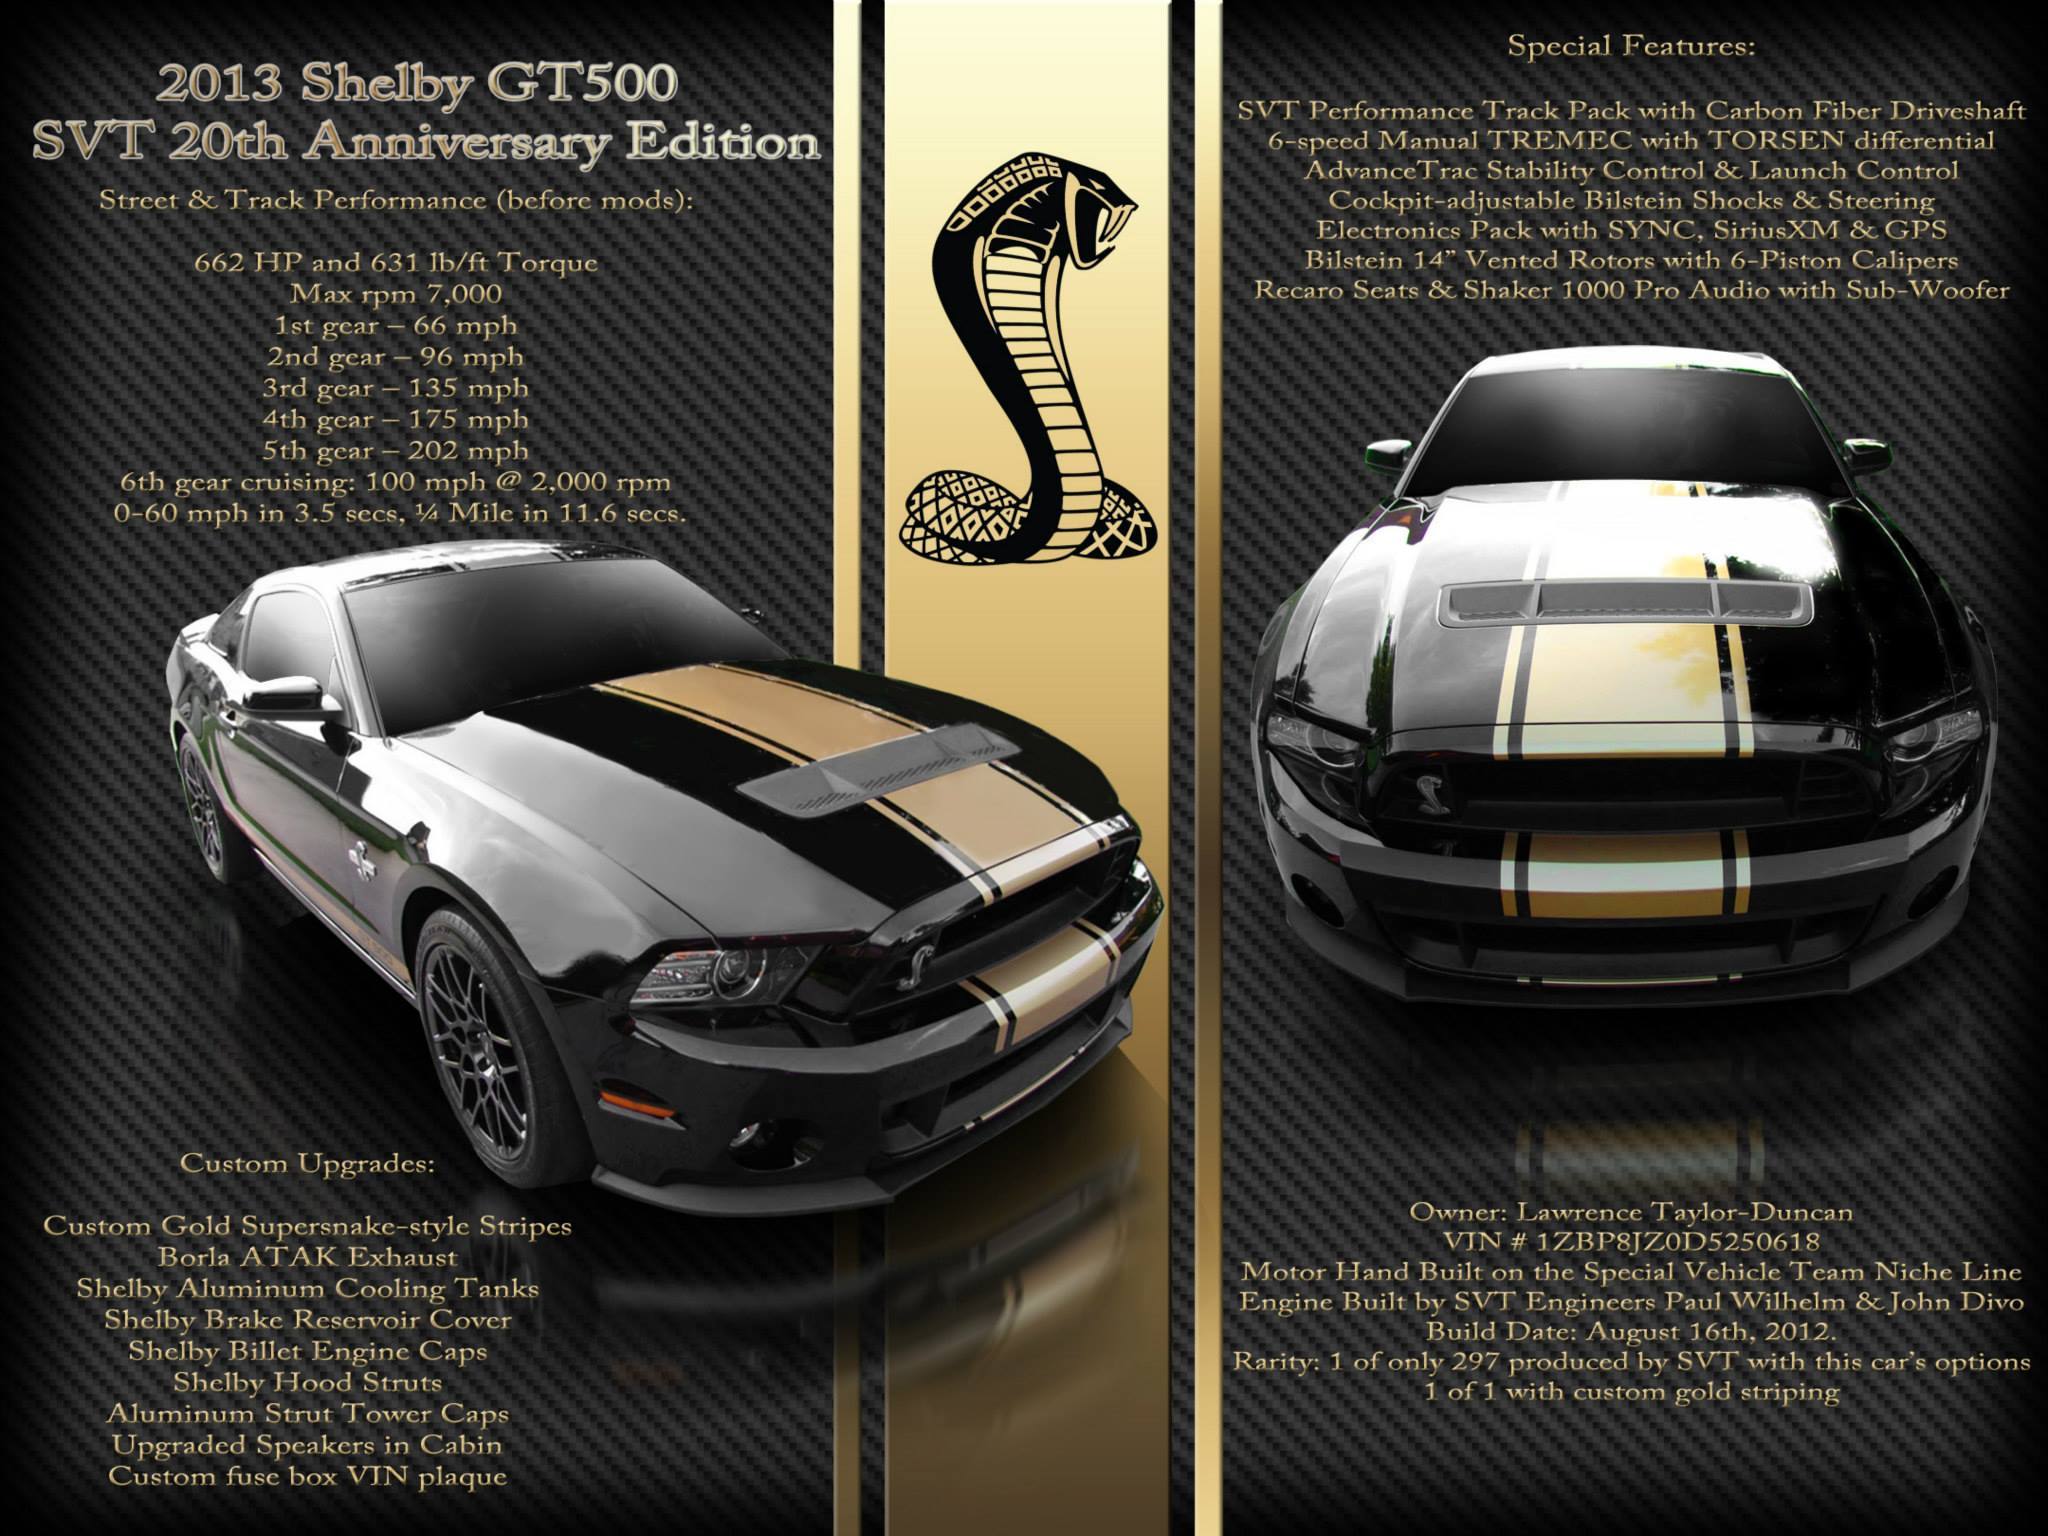
I then located my official Build Sheet from the SVT Team at Ford and discovered that my car, in Black with Stripe Delete with its specific options (it has all of them with the exception of the glass roof), was one of only 297 built in that model year with that particular option selection so that was a pretty low number! Going to Car Shows I also quickly learned that presentation and attention to detail was all-important so I made this display poster:
My first Car Display Poster back in spring of 2013
In January of 2014, I ordered a custom display stand made to match the car. It conveniently folds into three sections and the poster is laminated. Looks awesome!
My custom made display stand shows off the car really well!
Here is the first version of the poster. It has since been replaced to reflect the latest mods and performance enhancements done to the car.
The poster has all sorts on interesting facts about the car – right down to which SVT engineers hand built the engine!
UPDATE – March 2016 – here is my new display placard showing all my new mods!
My new display poster for 2016
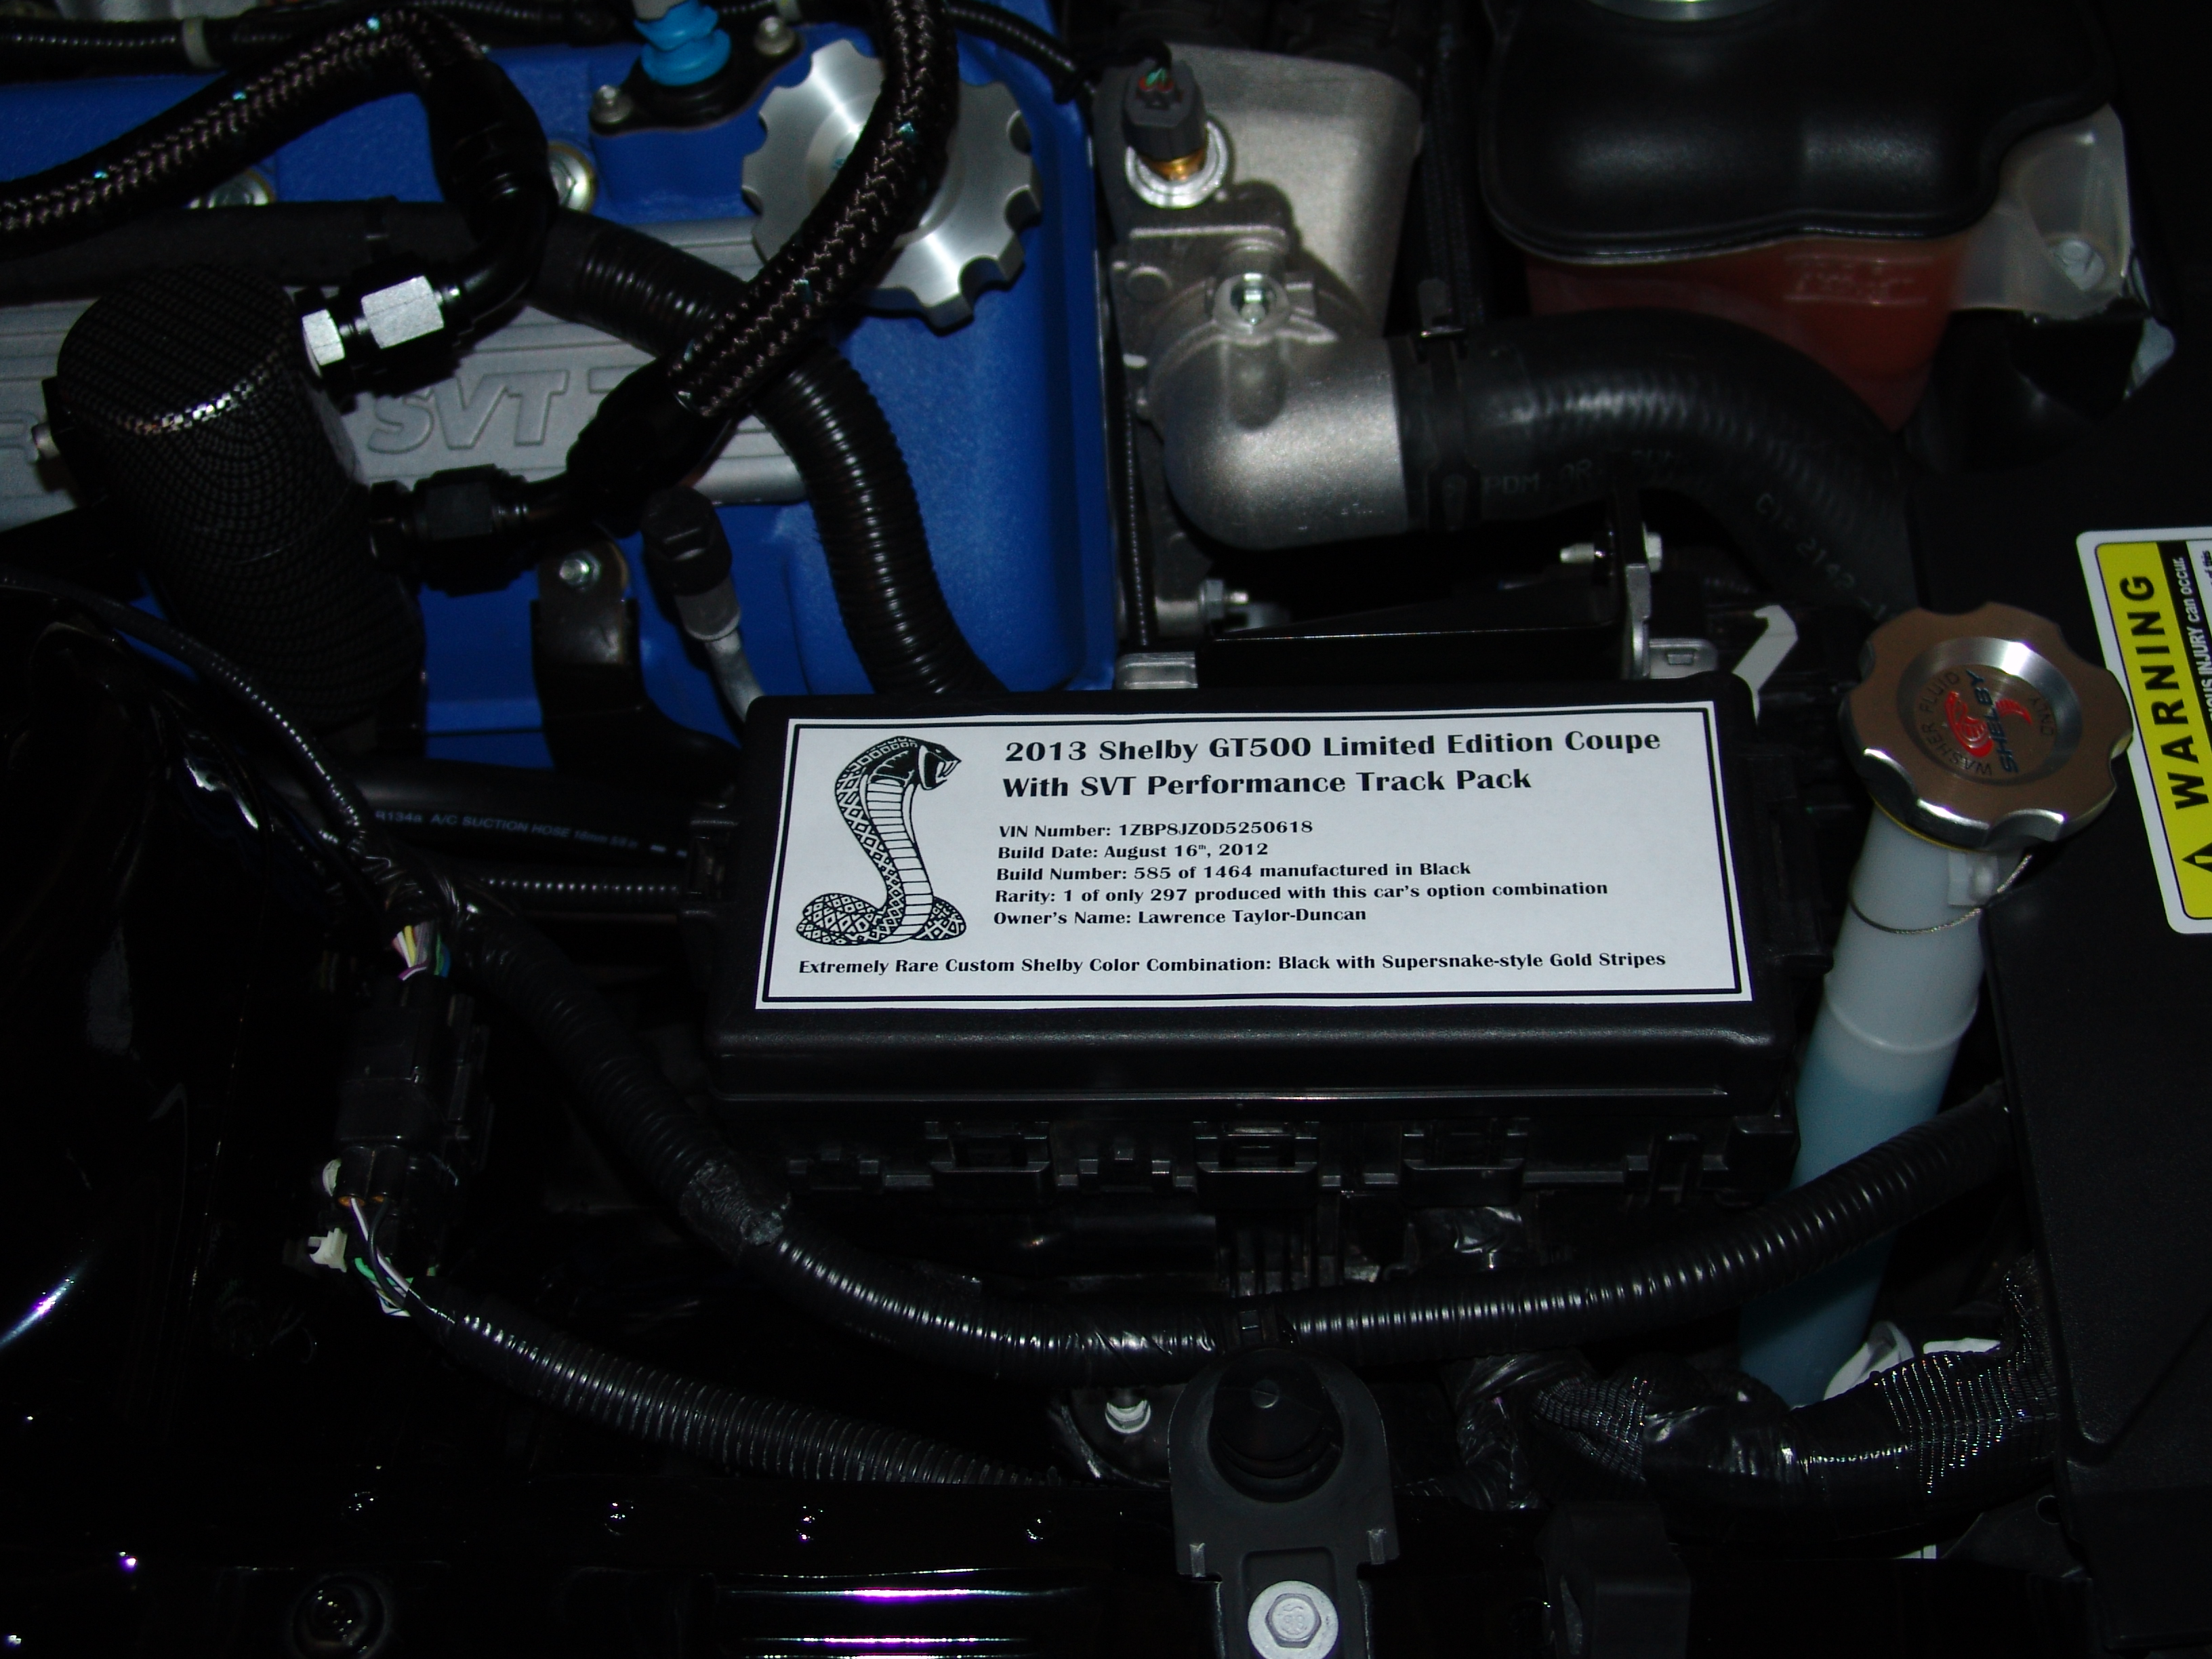
The engine bay did not go untouched – I got this nice laser-etched steel plaque made to cover the fuse box.
And so the fun begins! The first thing I had to do was get the Shelby registered. Clearly, this was no ordinary car so it wasn’t going to have an ordinary tag. Luckily, the State of Alabama has a website where you can go and plug in up to 4 possible tag numbers at a time to see if they are allowed or even available. I first tried 202MPH which would definitely be a statement and bragging point, but unlike our neighboring Tennessee to the north of us, anything to do with a declaration of speed is banned (as if anyone would do that on the public highway anyway), so that one was out.
Inspiration wasn’t far away. I got thinking of the day I test drove it. That day, the dealer himself sat in the passenger seat with my wife bundled in the back. We were already sitting in the car before he asked me if I had ever driven a fast car before (answer – a Ferrari Testarossi. He didn’t argue with that, even though this Shelby is significantly more powerful than the Ferrari was). Curiously, he didn’t even ask if I could drive a stick – I presume my British accent said it all – we all learn and take our tests on a stick over there so it is second nature to us. So off we went.
I guess it didn’t take the dealer long to realize I could competently handle this savage car. I say savage because it was awesomely powerful and gripped the road like a limpet. Of course, I was very mindful of the fact that this was still the test drive. I had not agreed to sign off on the car and wouldn’t close the deal without the test drive, but it still wasn’t my car yet, so I was being wisely cautious. 662HP is an insane amount of power and is not to be treated lightly and in case it slipped my mind while I was treading gently on the gas, the car had 220 MPH on the speedo staring me in the face as stark reminder of that brutal power just waiting to be unleashed.
The instrument cluster of the Shelby – with 220 MPH on the clock
So after a few brisk miles, we arrived at a red light. What happened next blew me away…as we sat there he nonchalantly said “Rev it to 4,000 rpm and drop the clutch!” What? This was a dealer who obviously had enormous faith in this car’s handling and my ability to steer and keep a rocket on the road. Common sense told me that while that would be “interesting” (we Brits like understatement), it might not be “wise” (yet) but when the lights hit green, I did give it a bunch of gas and we propelled forward fairly violently. I could feel the back tires jiggling as they scrambled to obey my command and after I eased up with a huge grin on my face, I had enough presence of mind to remember my poor wife was in the back…”You OK back there?”. I don’t recall expletives but I remember there was some sense of unease in whatever she said.
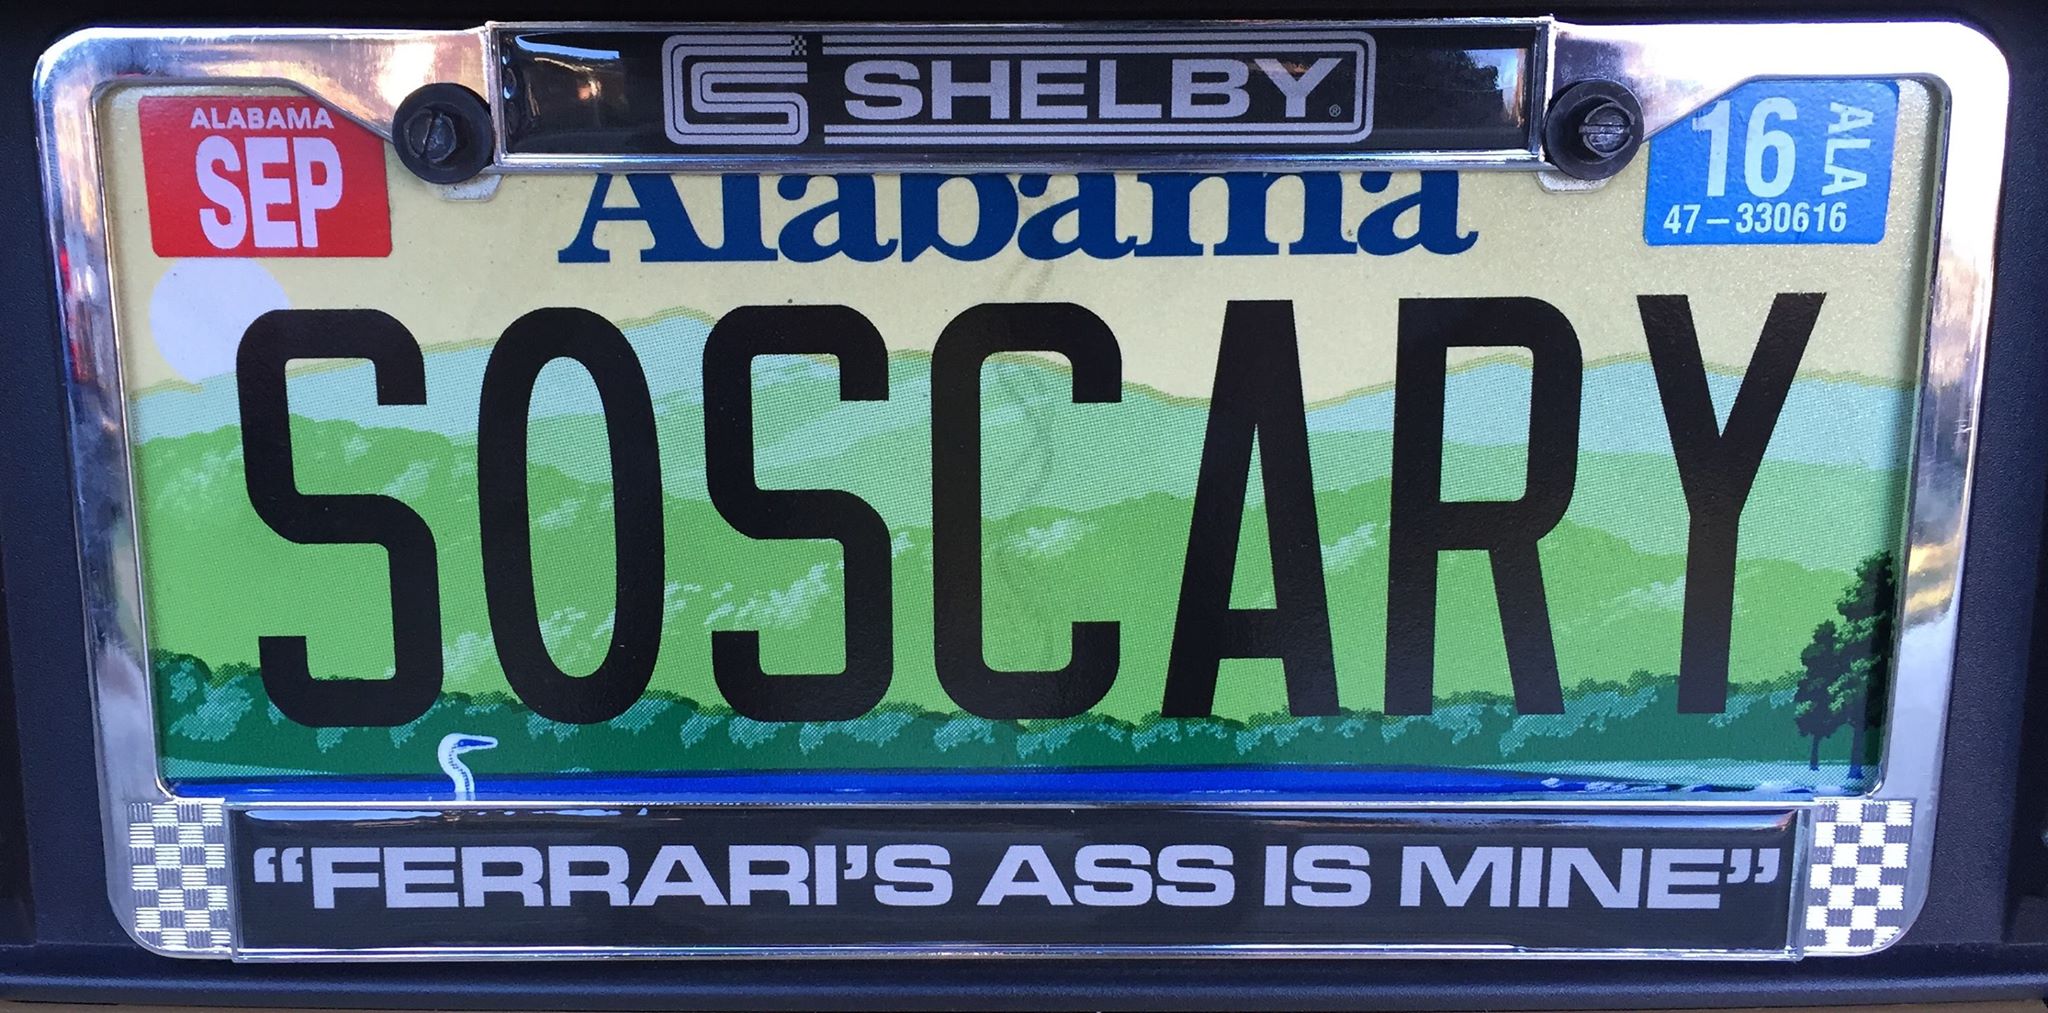
So here is where I got the inspiration for my tag. Back at the dealer, when I let her out of the back, her first words were “That was **** scary!”. Now this, coming from Police Officer accustomed to doing high speed chases was amusing! And henceforth, my unnamed Shelby became “SoScary”!